
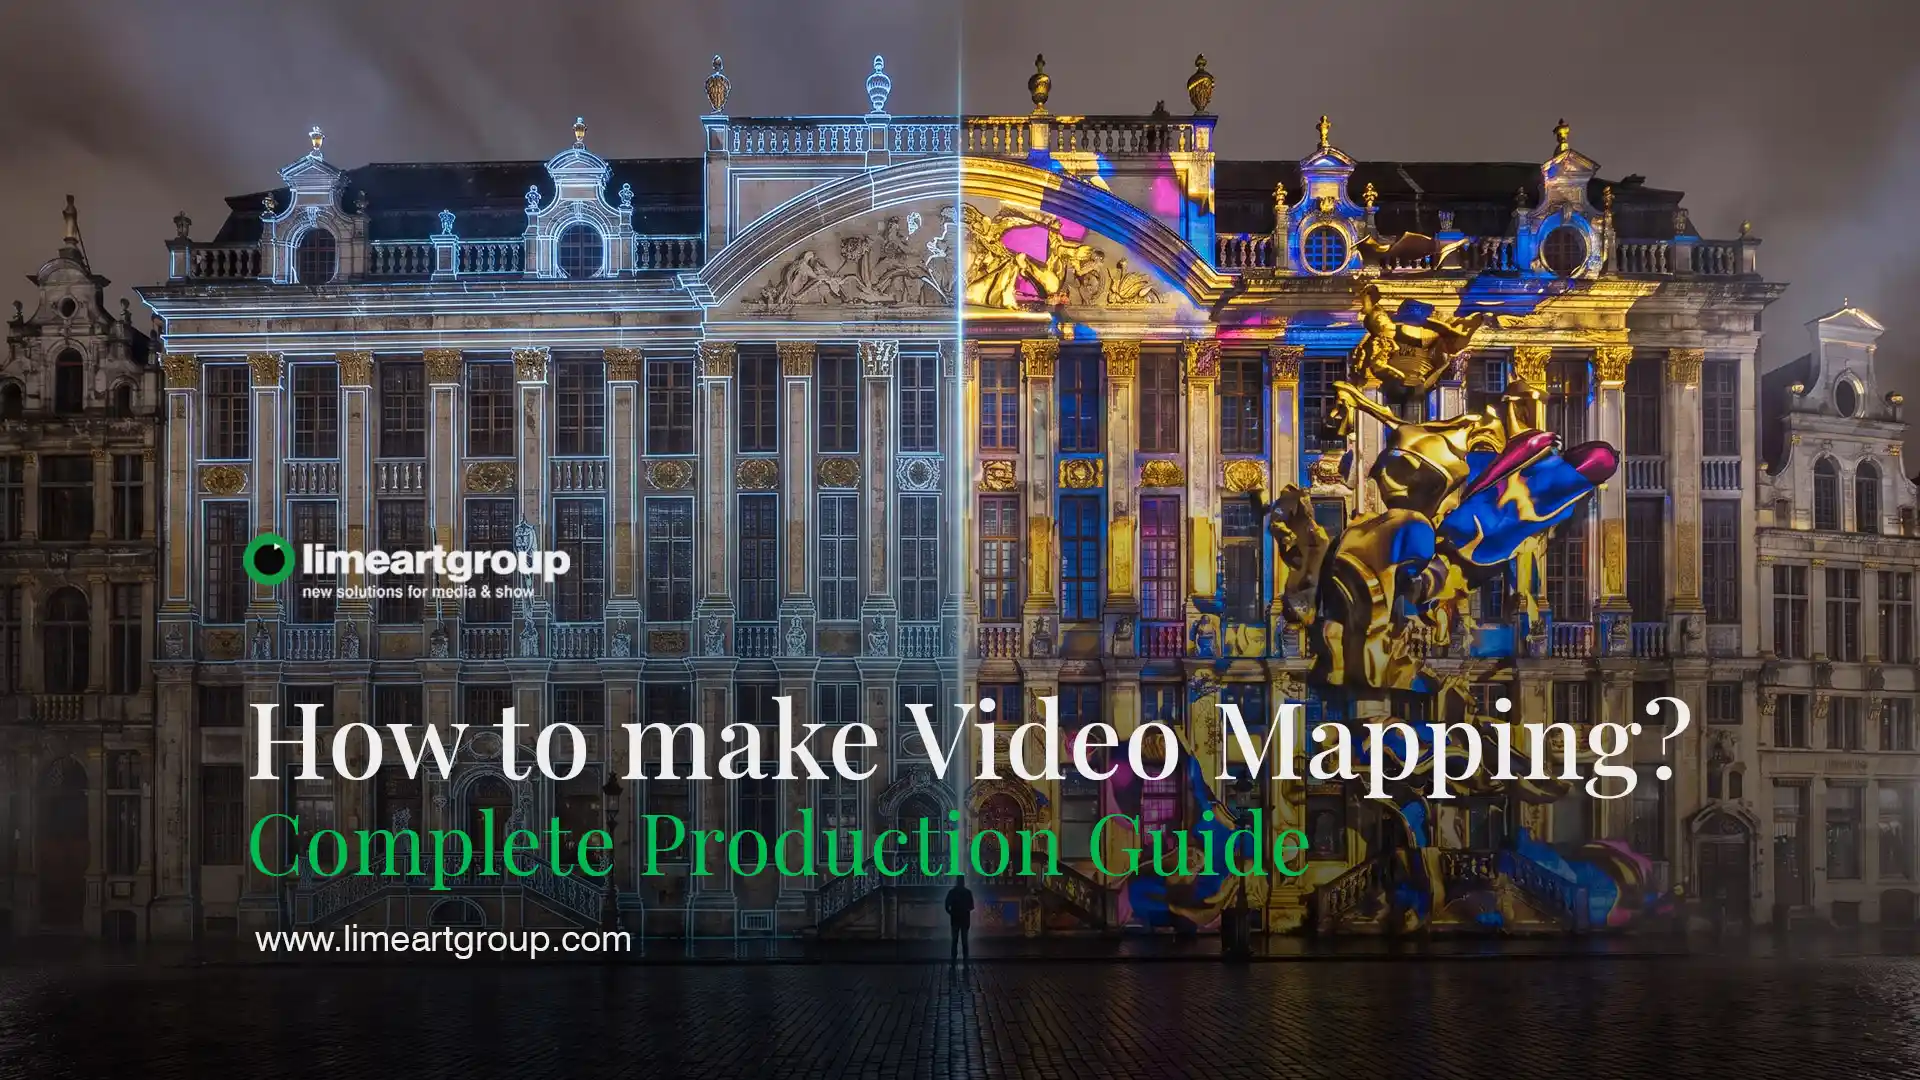
How to Make 3D Video Mapping Projection — The Complete Production Guide
The article is written by a human. Mistakes have been edited by AI.
Software versions, codecs and AI pricing checked July 2026.
Most mapping tutorials show you how to drag four corners onto a box. That takes ten minutes to learn and it is not the hard part. The hard part is producing eight minutes of content that fits a real building, loops cleanly, plays without stuttering, and still reads as architecture rather than wallpaper.
This guide is the full production pipeline: reference photo, mask, After Effects compositing, architectural elements, sound, export codec, and finally the projector. It is the workflow we use in production, written out step by step.
Who this guide is for: motion designers, VJs and event technicians who want to produce a mapping show themselves — not to hire one. If you have never opened After Effects, start with the software section and come back.
What it solves: every tutorial teaches you either the software or the mapping. Almost none teach you the production order, which is where beginners actually lose weeks.
What you get by the end: a repeatable pipeline from facade photograph to a file that plays on a projector, plus the specific settings — resolutions, codecs, blend modes, export presets — that make it work the first time.
Hello dear VJs and clients of LIME ART GROUP. I am new media artist Alexander Kuiava. I built one of the first purpose-made libraries of architectural mapping loops in 2012 and presented it at a VJ meeting in Poland, and since then our studio has produced content for facades, stages, domes, cars and cakes. Everything below is the method we actually use, including the parts that are boring.
The video mapping production pipeline
Video mapping is two separate crafts that beginners try to do at the same time and should not. One is designing the show. The other is mapping it onto the object. They use different software, happen at different times, and if you mix them you will redo your work.
The full pipeline, in order:
| # | Stage | Software | Output |
|---|---|---|---|
| 1 | Survey the object and the site | Camera, tape measure | Reference photos, dimensions |
| 2 | Build the guide (mask) | Photoshop / GIMP / Blender | A flat guide image of the surface |
| 3 | Composite the content | After Effects / DaVinci Resolve | Layered animation on the guide |
| 4 | Add architectural elements | After Effects + toolkits | Columns, arcs, windows animated |
| 5 | Add depth and texture | Video mapping loops, projection textures | The 3D illusion |
| 6 | Sound design | Audio editor + mapping audio packs | Synced soundtrack |
| 7 | Export | AE render queue, Shutter Encoder | HAP / DXV / ProRes master |
| 8 | Map to the object | MadMapper / Resolume Arena | Warped, masked output |
| 9 | Run the show | Media server or media player | The evening |
Steps 1–7 happen indoors, on your own time. Step 8 happens on site and, if you have done 1–7 properly, takes about ten minutes.


The two mapping methods, and why the choice comes first
Before you design a single frame you must decide which of two methods you are using, because it changes everything downstream.
The outline method. You put the projector in its final position, project a white field, and physically trace the outlines of the building — windows, cornices, roof lines — to create a guide. You then design your show over that guide. The perspective of the projector is baked into your content from the start.
Advantages: simple to understand, no 3D work, and the projector’s point of view is also the best viewing position for the audience standing behind it.
Disadvantages, and they are serious: the projector must not move again. Not for weather, not because someone kicked the tripod, not because you brought it inside overnight. If it moves, your content no longer fits. You cannot change the projection angle. You cannot add a second projector from another side without redesigning the entire show. And you have to do the tracing outdoors, at night, in whatever weather October gives you.
The orthographic method. You build a flat, perspective-free guide of the facade — either from an architectural elevation drawing, or by photographing the building and reconstructing it. You design your content on that neutral guide. Perspective is introduced later, on site, by the mapping software.
Advantages: the projector is free until the night of the show. You can place it off to one side so the audience has an uninterrupted central view. You can add a second or third projector without multiplying the design work. You can bring the projector indoors every night. All the creative work happens at your desk.
Disadvantage: you need an accurate orthographic guide, and building one takes an hour or two the first time.
We use the orthographic method for everything except one-night object mapping. The flexibility is worth the extra setup, and the moment a client asks for a second projector you will understand why.

Building the guide
Three ways, from easiest to most robust:
From an architectural elevation. If the client can supply a front-on CAD drawing or elevation of the building, you are done. Import it, scale it, and you have a perfect perspective-free guide.
From a single photograph with edge detection. Take one straight-on reference photo in daylight. Open it in Photoshop or GIMP, run an edge-detect filter, clean up the result, and you have an outline of the architectural features. This is fast and good enough for most simple facades. On site you correct the remaining perspective with corner-pin in the mapping software.
From photogrammetry. For a complex or irregular building, photograph it from many angles and reconstruct a 3D model. Free tools that do this are Meshroom, 3DF Zephyr and Regard3D. Bring the resulting mesh into Blender, set up an orthographic camera facing the facade, and render a flat guide. This is the accurate route and the only sensible one for anything with real depth — projecting bays, towers, sculpted portals.
Whichever route you take, the deliverable is the same: a flat image, at your show resolution, where every architectural feature sits exactly where it belongs. Everything else in this guide is built on top of that file.
Survey the site before you design anything
Ten minutes of looking at the building will save you a week of rendering. Note:
Surface colour and material. Light bounces off white and light grey; dark brick, dark render and stone absorb it. A white facade will look dramatically brighter than a dark one with the same projector. If the surface is dark and the budget matters more than the schedule, it can be covered — fabric, screens, even paint.
Texture. Smooth render shows an image cleanly. Rough stone scatters it and distorts detail, so do not plan detailed footage or legible text on those areas. Abstract light and colour survive rough surfaces; a face or a logo does not.
Windows. Projector light goes straight through glass and forms no image. If windows are part of your composition they need something behind them to catch the light — pull-down shades, fabric stretched on frames, frosted shower curtains, paper, card, or perforated vinyl if the occupants still want to see out. Whatever you use must be smooth: every crease and fold becomes a visible distortion.
Shadow casters. Anything between the projector and the surface makes a hole in your show — trees, shrubs, statues, lamp posts, parked cars. Choose a projector position that avoids as many as possible, and design the show so nothing important lands in the shadows you cannot avoid. A one-storey porch will shadow the wall above it if you project from below its roof line, so mount the projector higher.
Ambient light. Street lighting, yard lights, sky glow, car headlights and shop windows all wash out your projection. Talk to whoever manages the street lighting; they can sometimes shield or switch off a lamp for the evening. Ask neighbours to kill their yard lights during the show. Schedule the show after full darkness. Controlling ambient light is the cheapest brightness upgrade that exists — it is free, and it can save you an entire projector tier.

How to make video mapping content in After Effects
This is the core of the guide. Everything here assumes you have a flat guide image of the facade and a project at your show resolution.
Step 1 — Set up the project correctly
Composition resolution. Match your projector’s native output, not its input capability. Most event projectors output 1920×1080, so that is your default canvas. If you are running a multi-projector blend or a 4K-native machine, build at the total output resolution of the blended canvas and slice it later.
Frame rate. Match the projector and the media server. 30 or 60 fps for most event work. Do not mix rates inside one show; a 25 fps clip in a 30 fps timeline will judder in a way that is very visible on a large surface.
Colour. Work in 8-bit unless you have a specific reason not to. Projection has far less dynamic range than a monitor, and banding that is invisible on your screen will be obvious on a fifteen-metre wall. Test your gradients dark.
Guide layer. Import your facade guide, place it at the bottom of the composition, and lock it. Everything you build sits in register with this layer. Duplicate it to the top as a reference overlay you can toggle at 30% opacity to check alignment.
Step 2 — Cut the architecture into layers
Do not treat the facade as one surface. Mask it into its real components: wall planes, window openings, cornices, columns, pediment, roof, base. Each becomes its own layer with its own alpha.
This is tedious and it is the single most valuable hour in the whole project. Once the building is separated, every effect you apply afterwards can respect the architecture — you can extrude the columns without touching the wall, light the cornice independently, open the windows one at a time. A show built on one flat layer always looks like wallpaper. A show built on separated architecture looks like the building is doing something.
Use the pen tool for straight architectural edges. Use a luma matte from the guide for repeating detail like balustrades and brickwork.
Step 3 — Texture the wall
Now you replace the real surface with your own.
Take your architectural texture — the masked wall plane — and blend animation into it. The technique that does most of the work is the stencil luma / track matte relationship: put your animated content above the architectural texture, set the texture as a luma matte, and the animation only appears where the architecture is. Colourise, invert, and mix.
Blend modes that behave well in projection:
| Mode | Use |
|---|---|
| Add / Linear Dodge | Light effects, glows, particles. Projection is additive light, so this matches the physics. |
| Screen | Softer version of Add. Safe default for overlays. |
| Overlay / Soft Light | Texturing a surface without blowing out the highlights. |
| Multiply | Almost never. Multiplying toward black means projecting nothing. |
| Stencil Luma | Constraining animation to an architectural shape. |
The rule underneath all of this: projected black is projected nothing. Your darkest value is the unlit surface. This is why mapping content is designed with high contrast and hard blacks — and why a beautifully graded film look, dropped straight onto a facade, reads as grey mush.
Step 4 — Add animated architectural elements
This is where a show stops being a light effect and becomes a building coming apart.
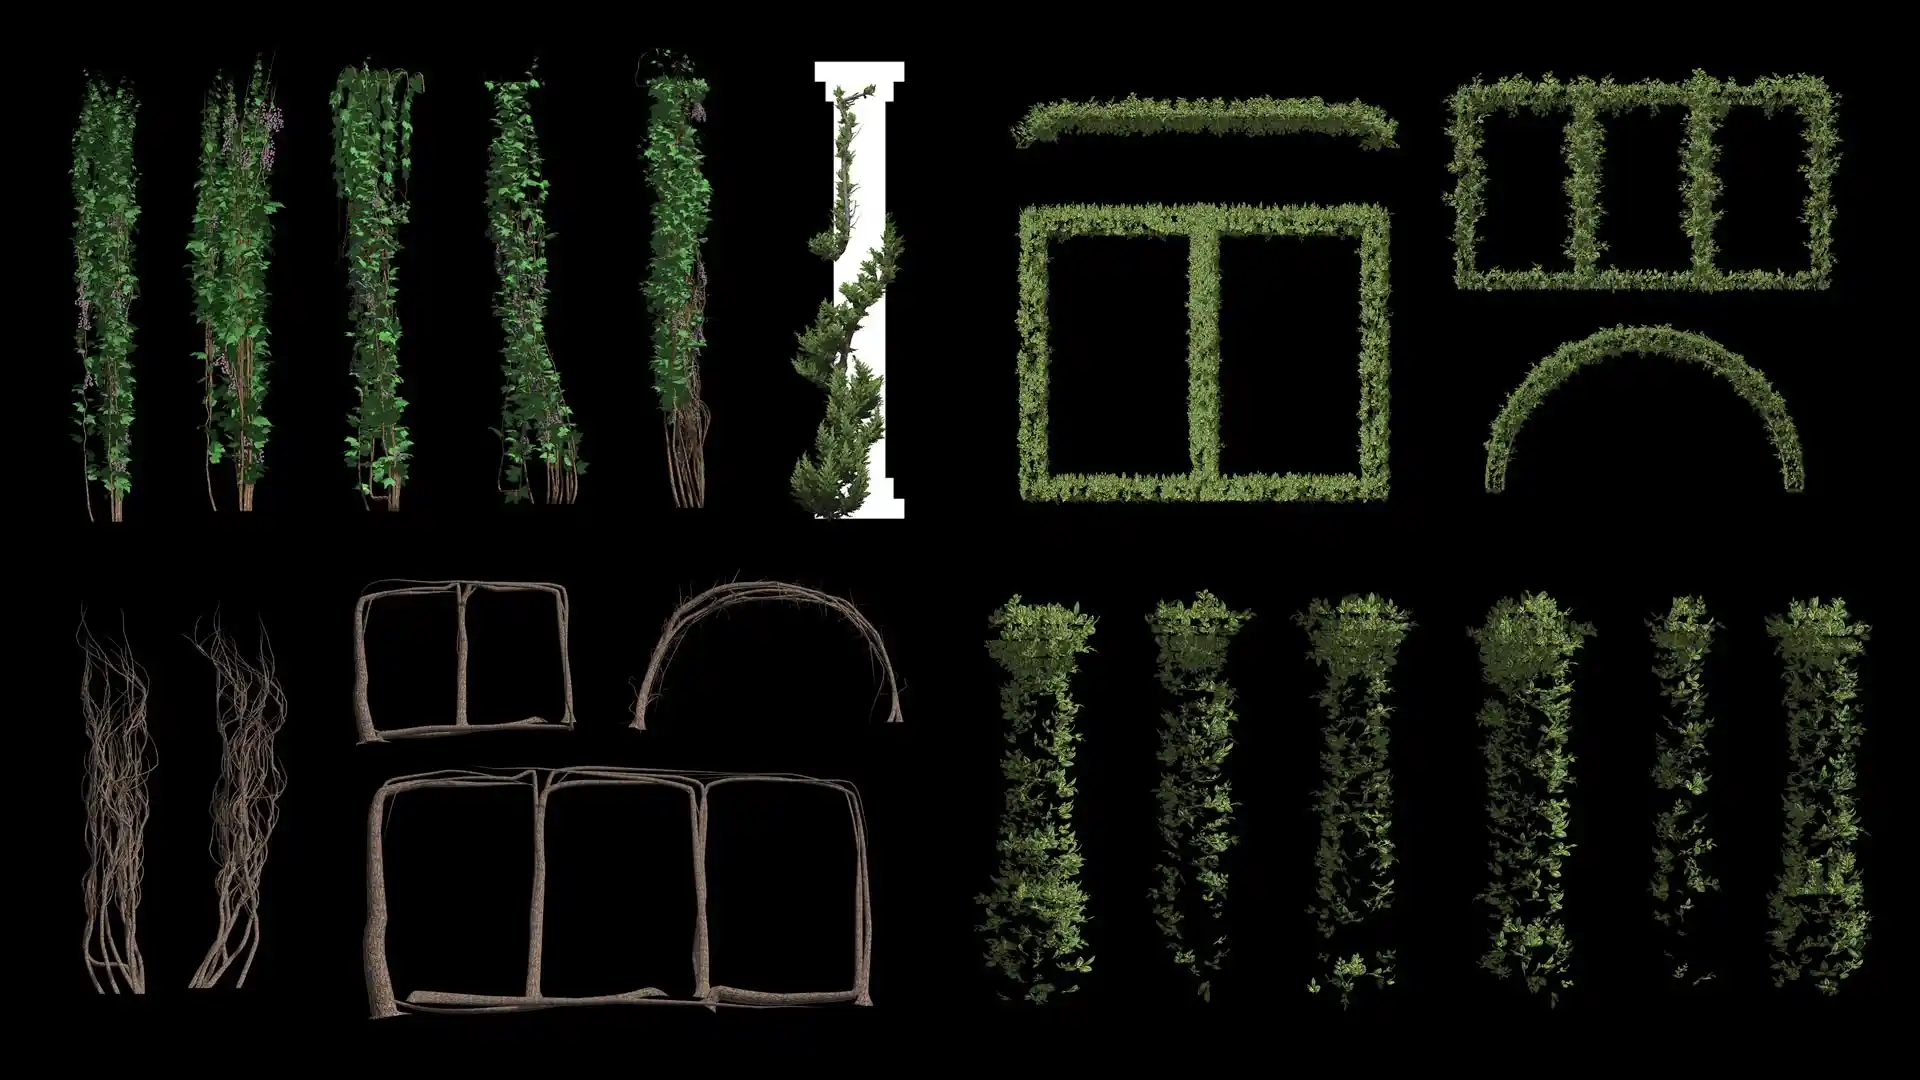
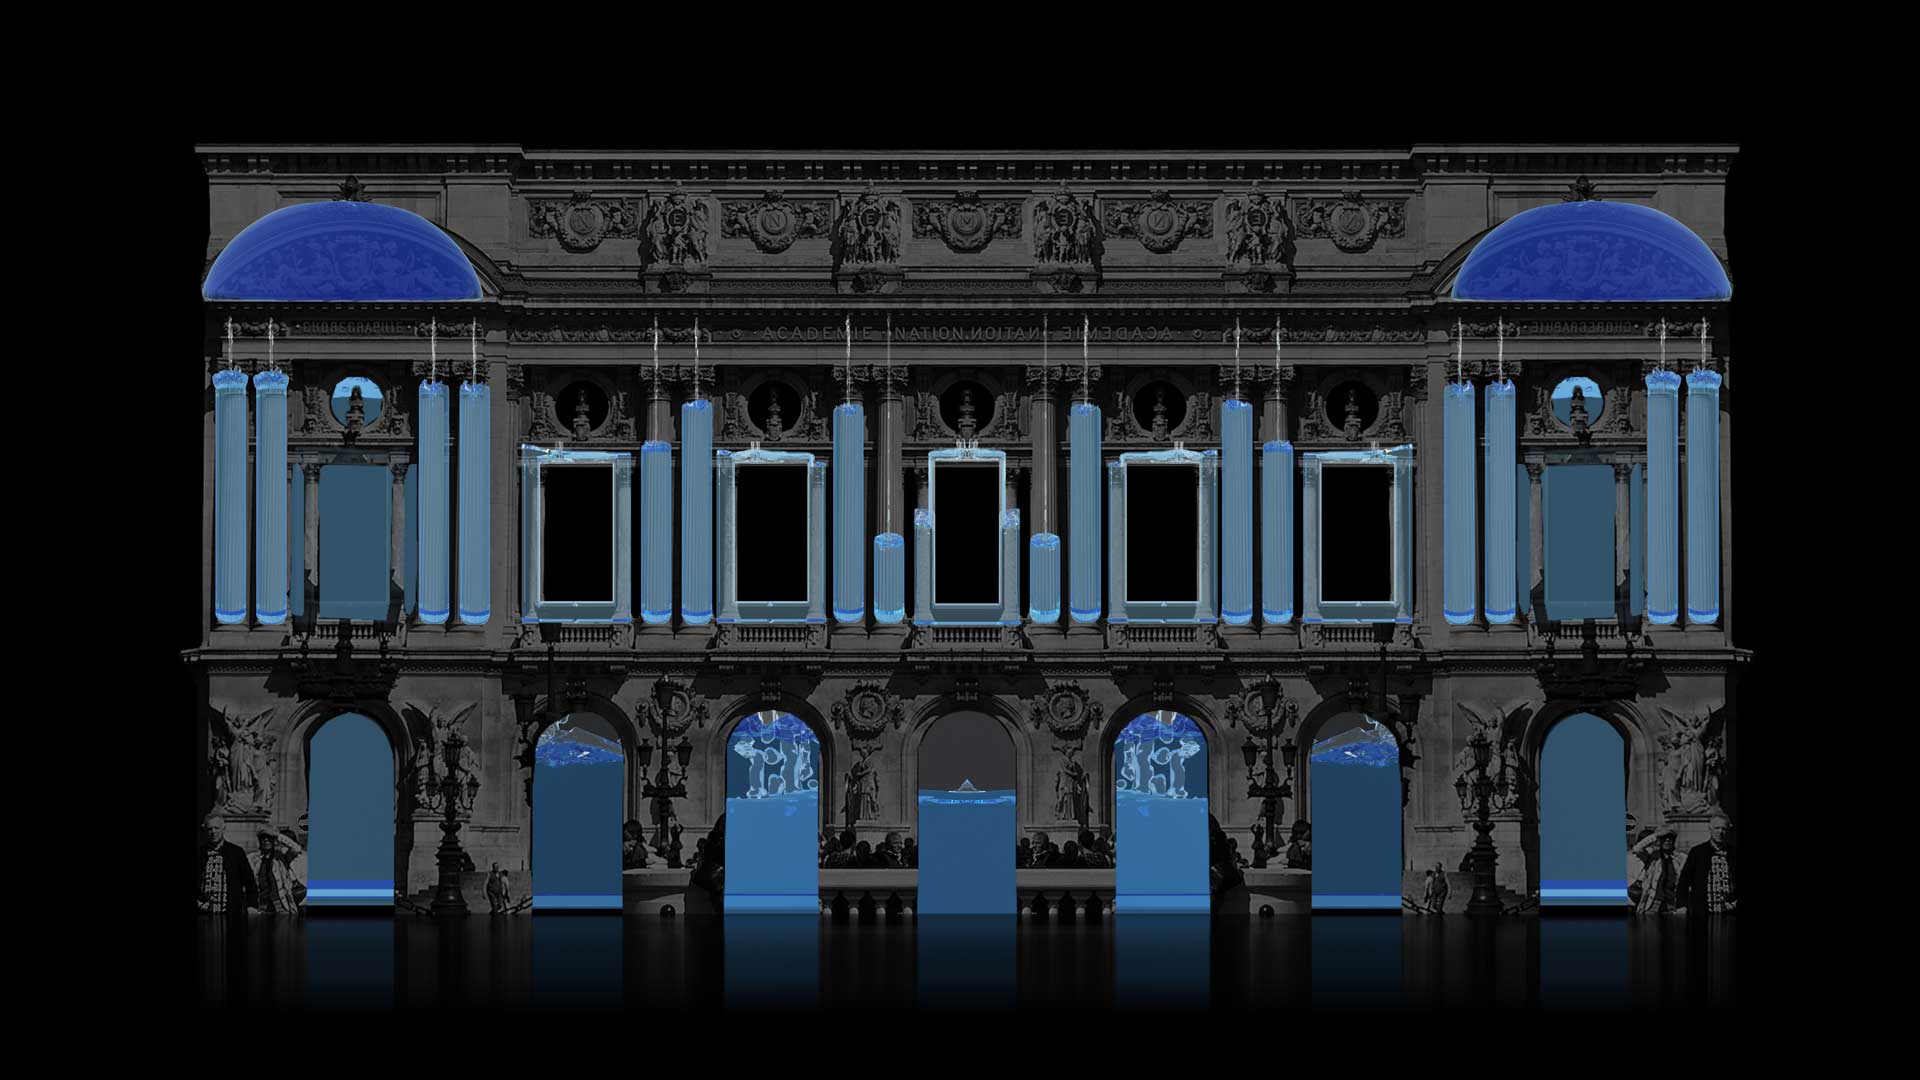
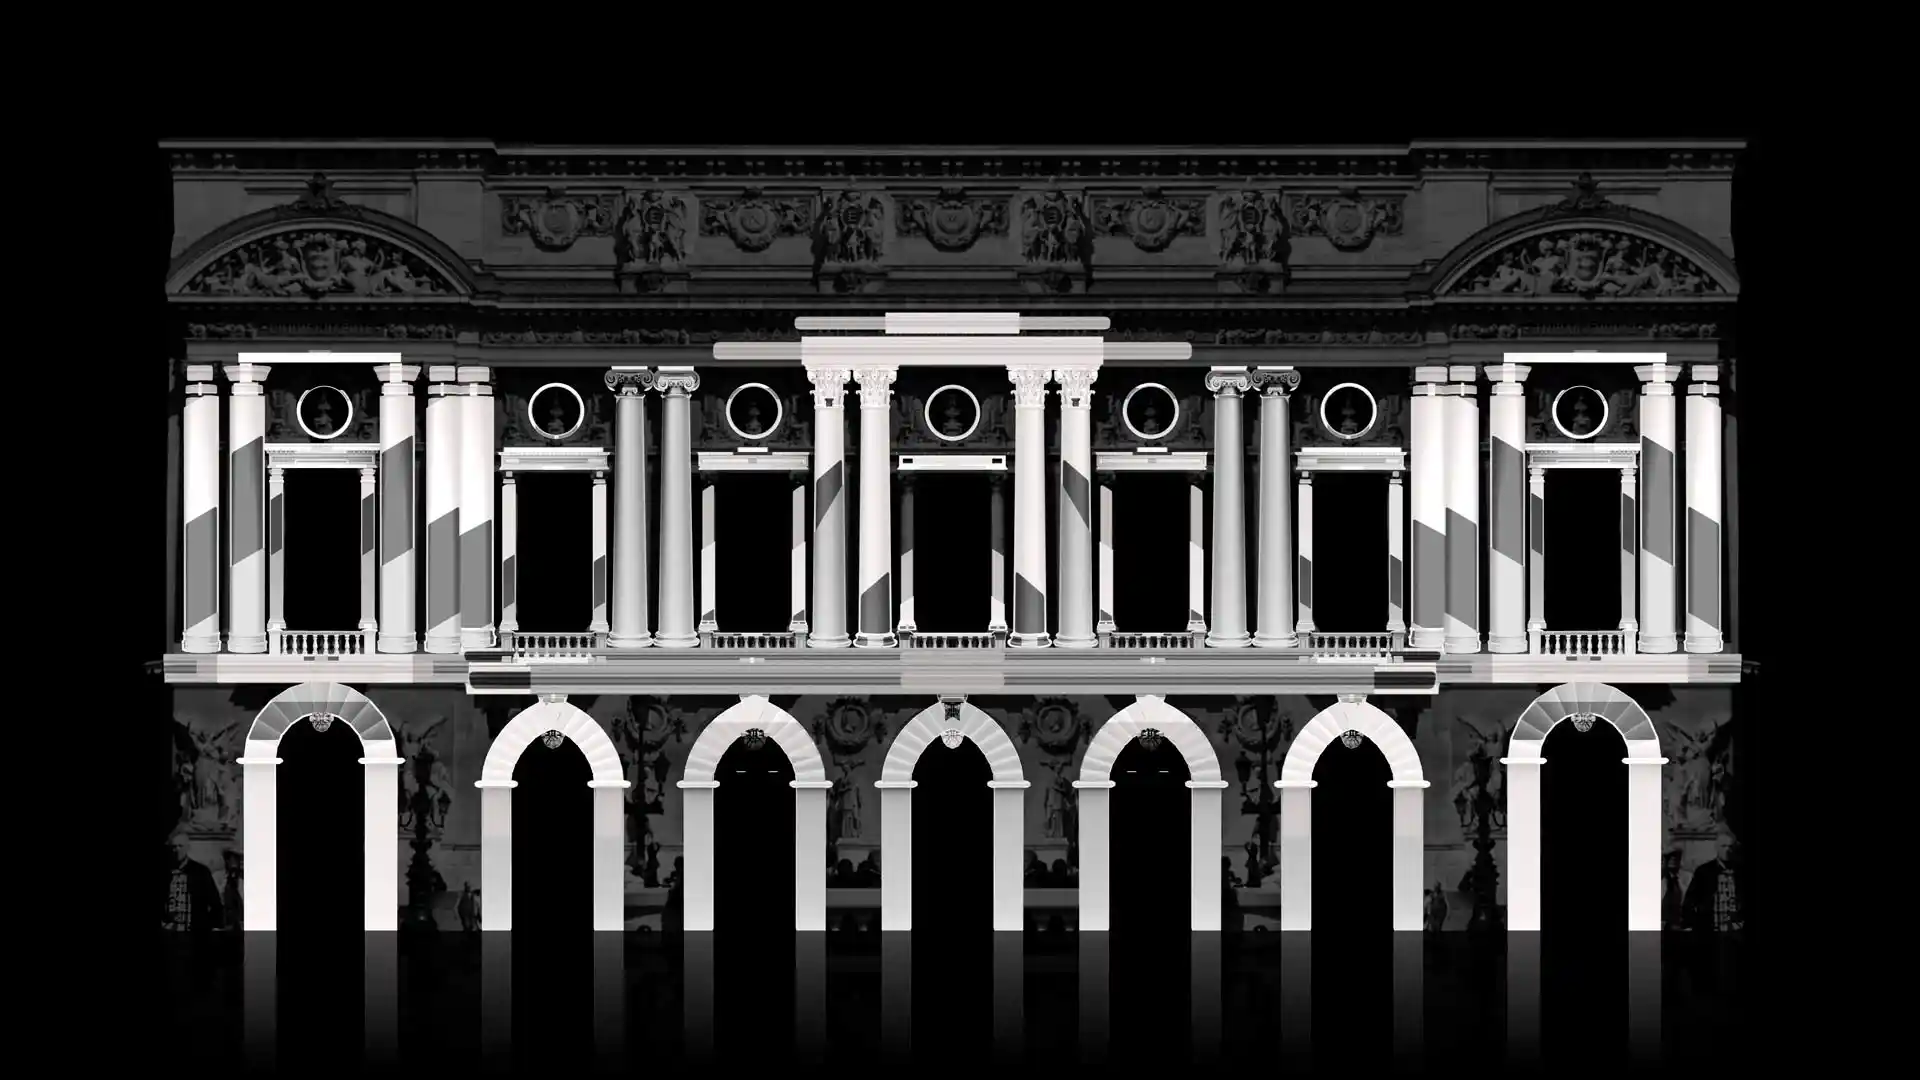
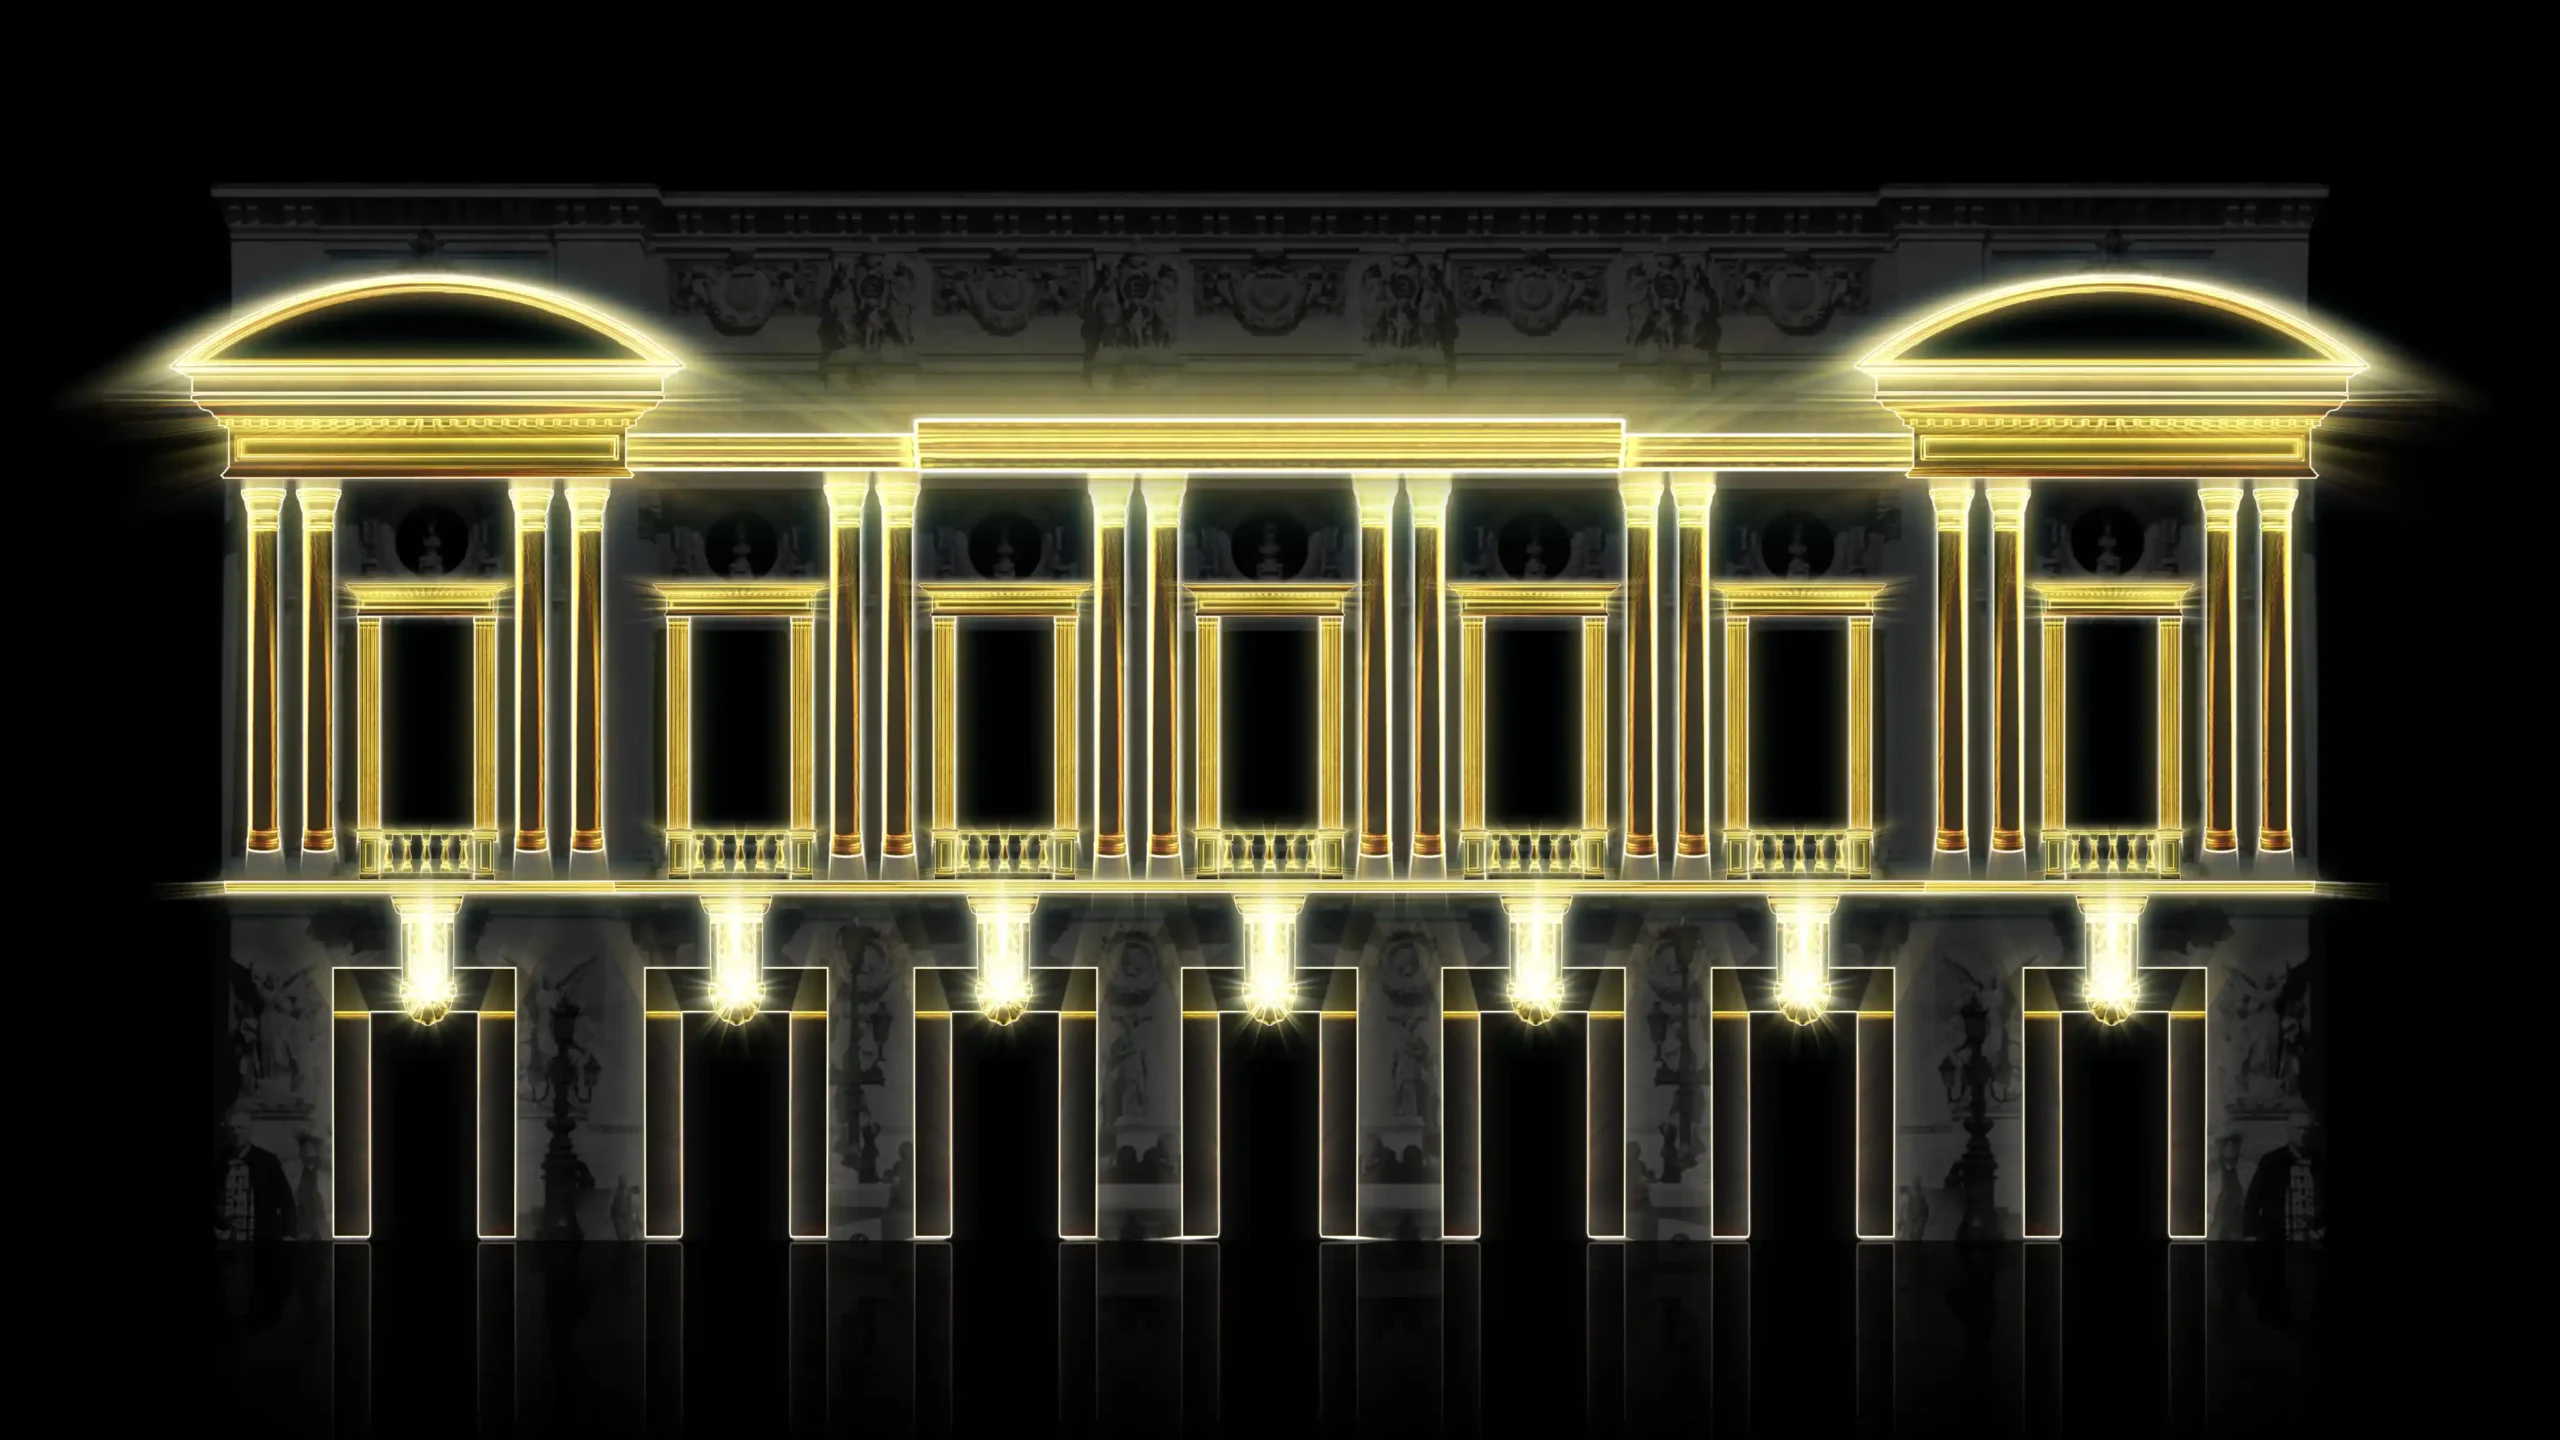
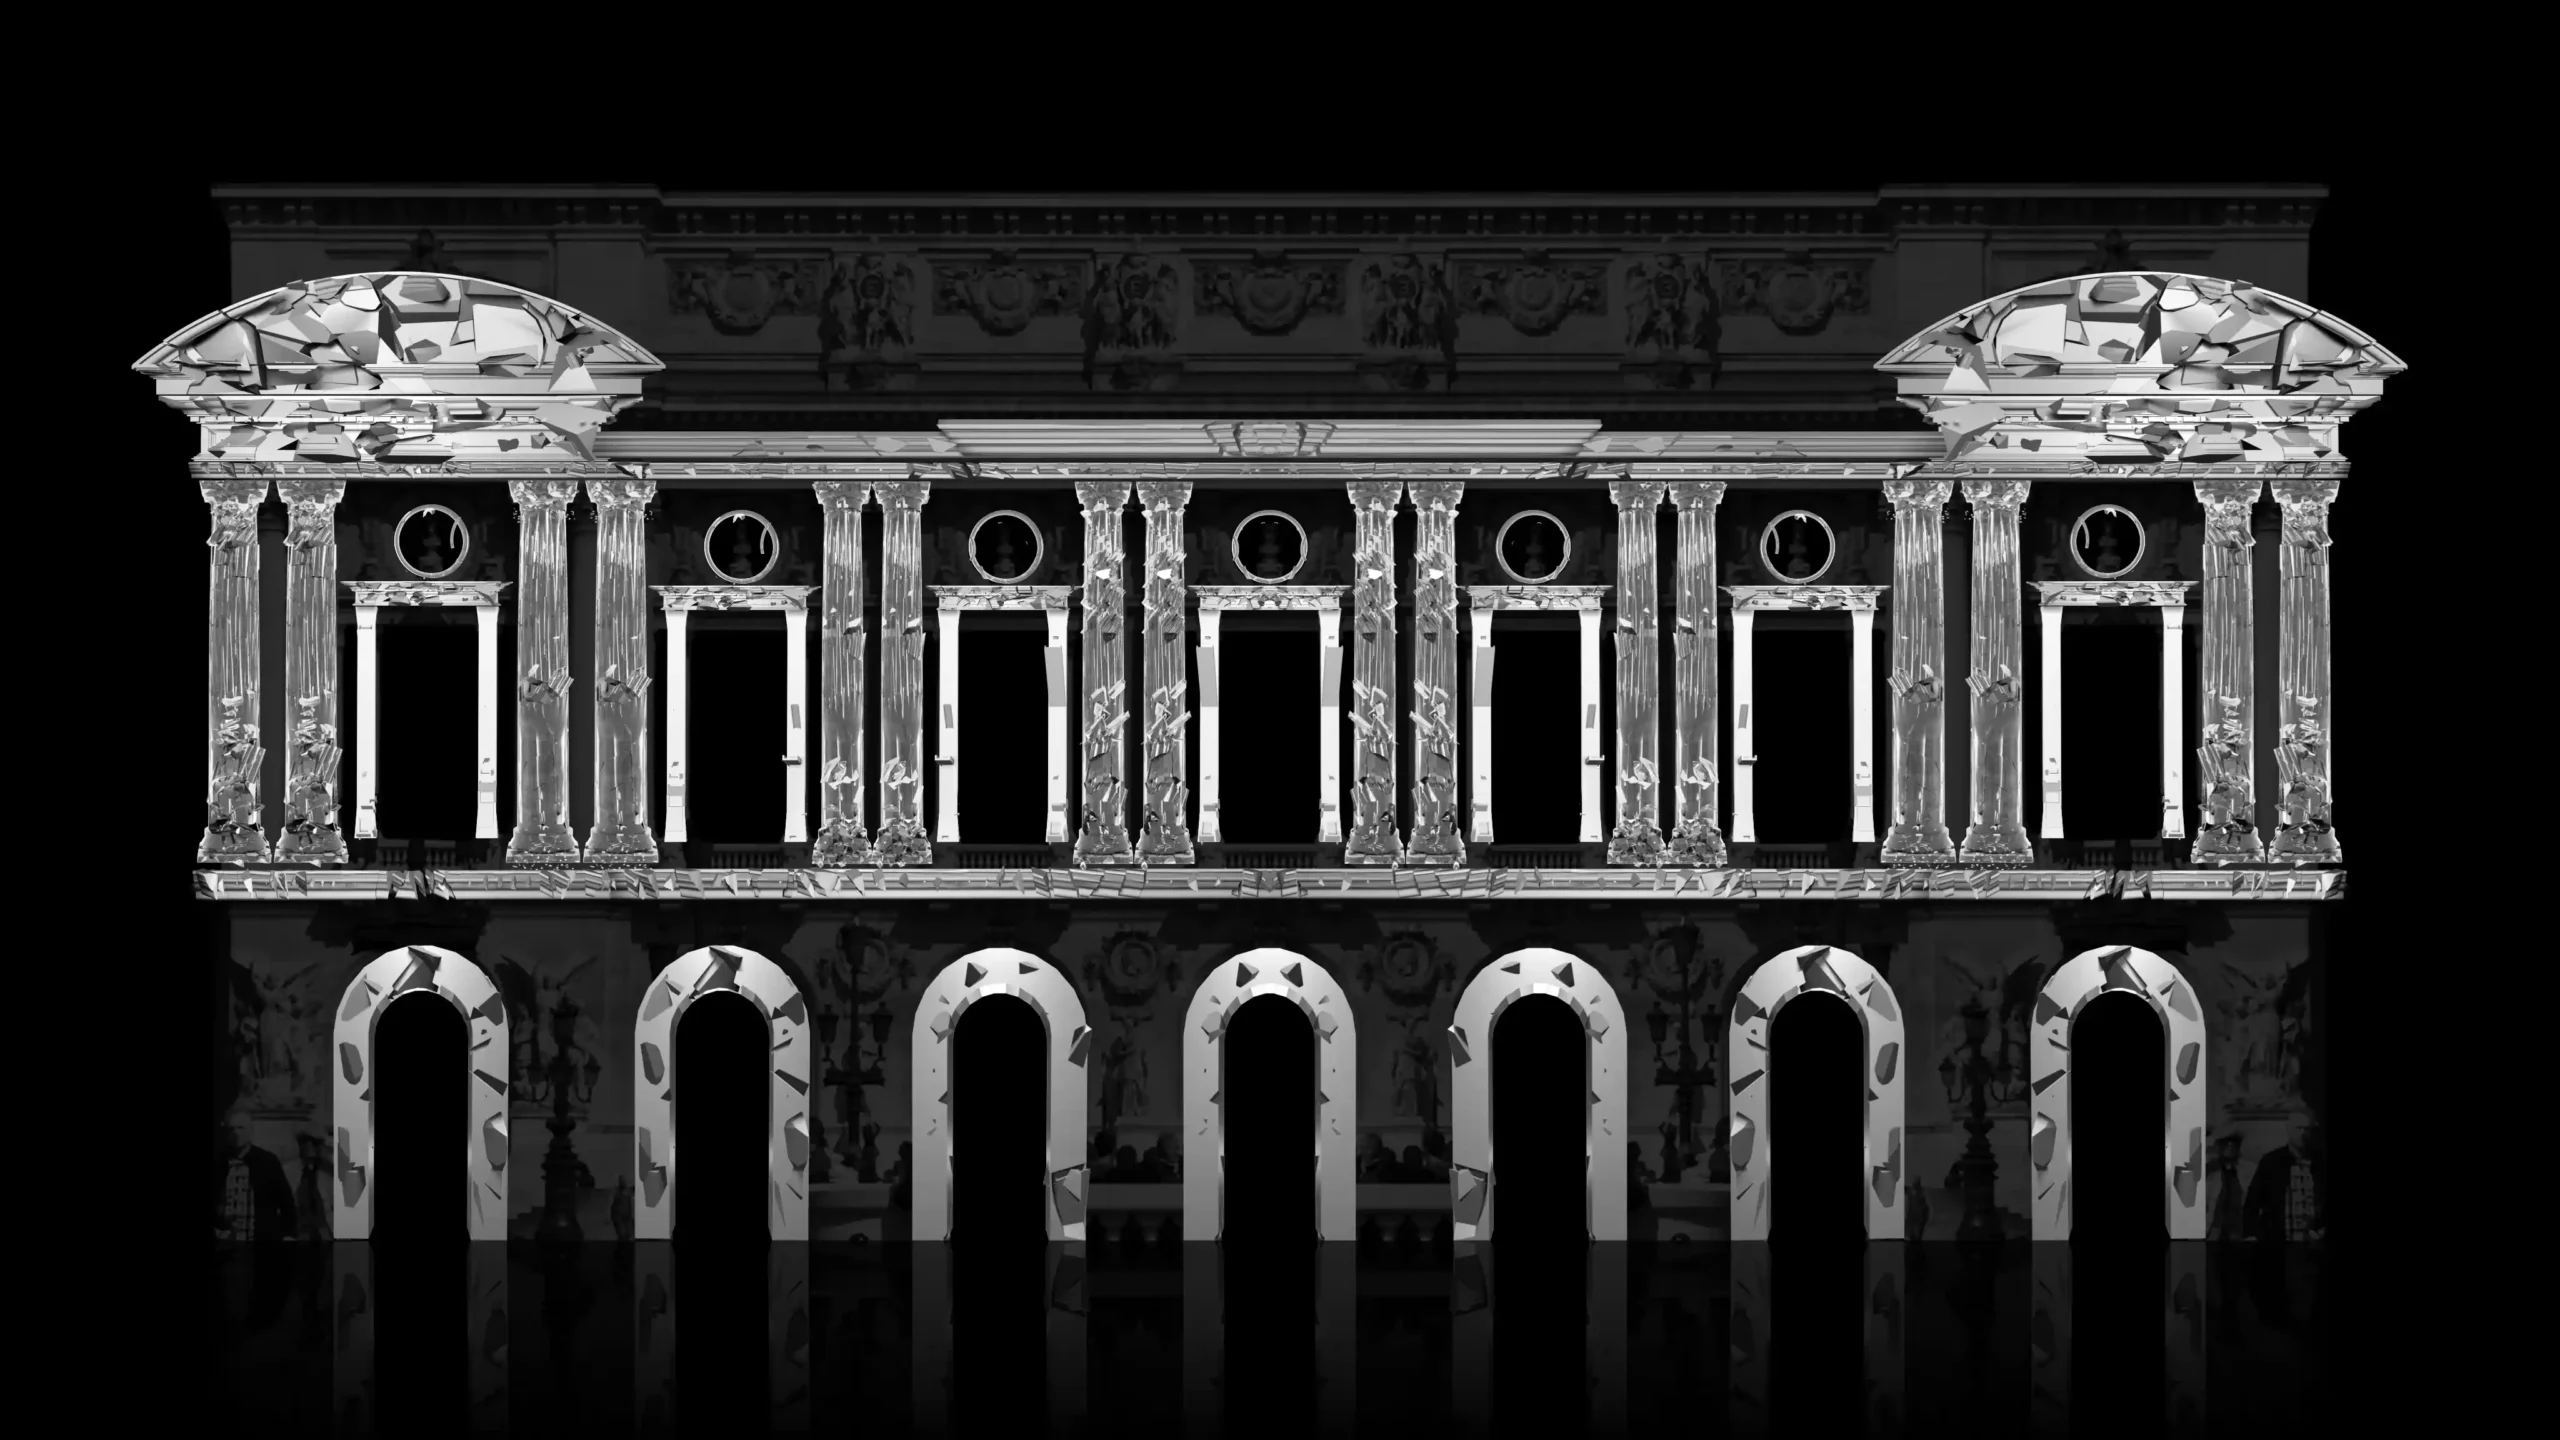
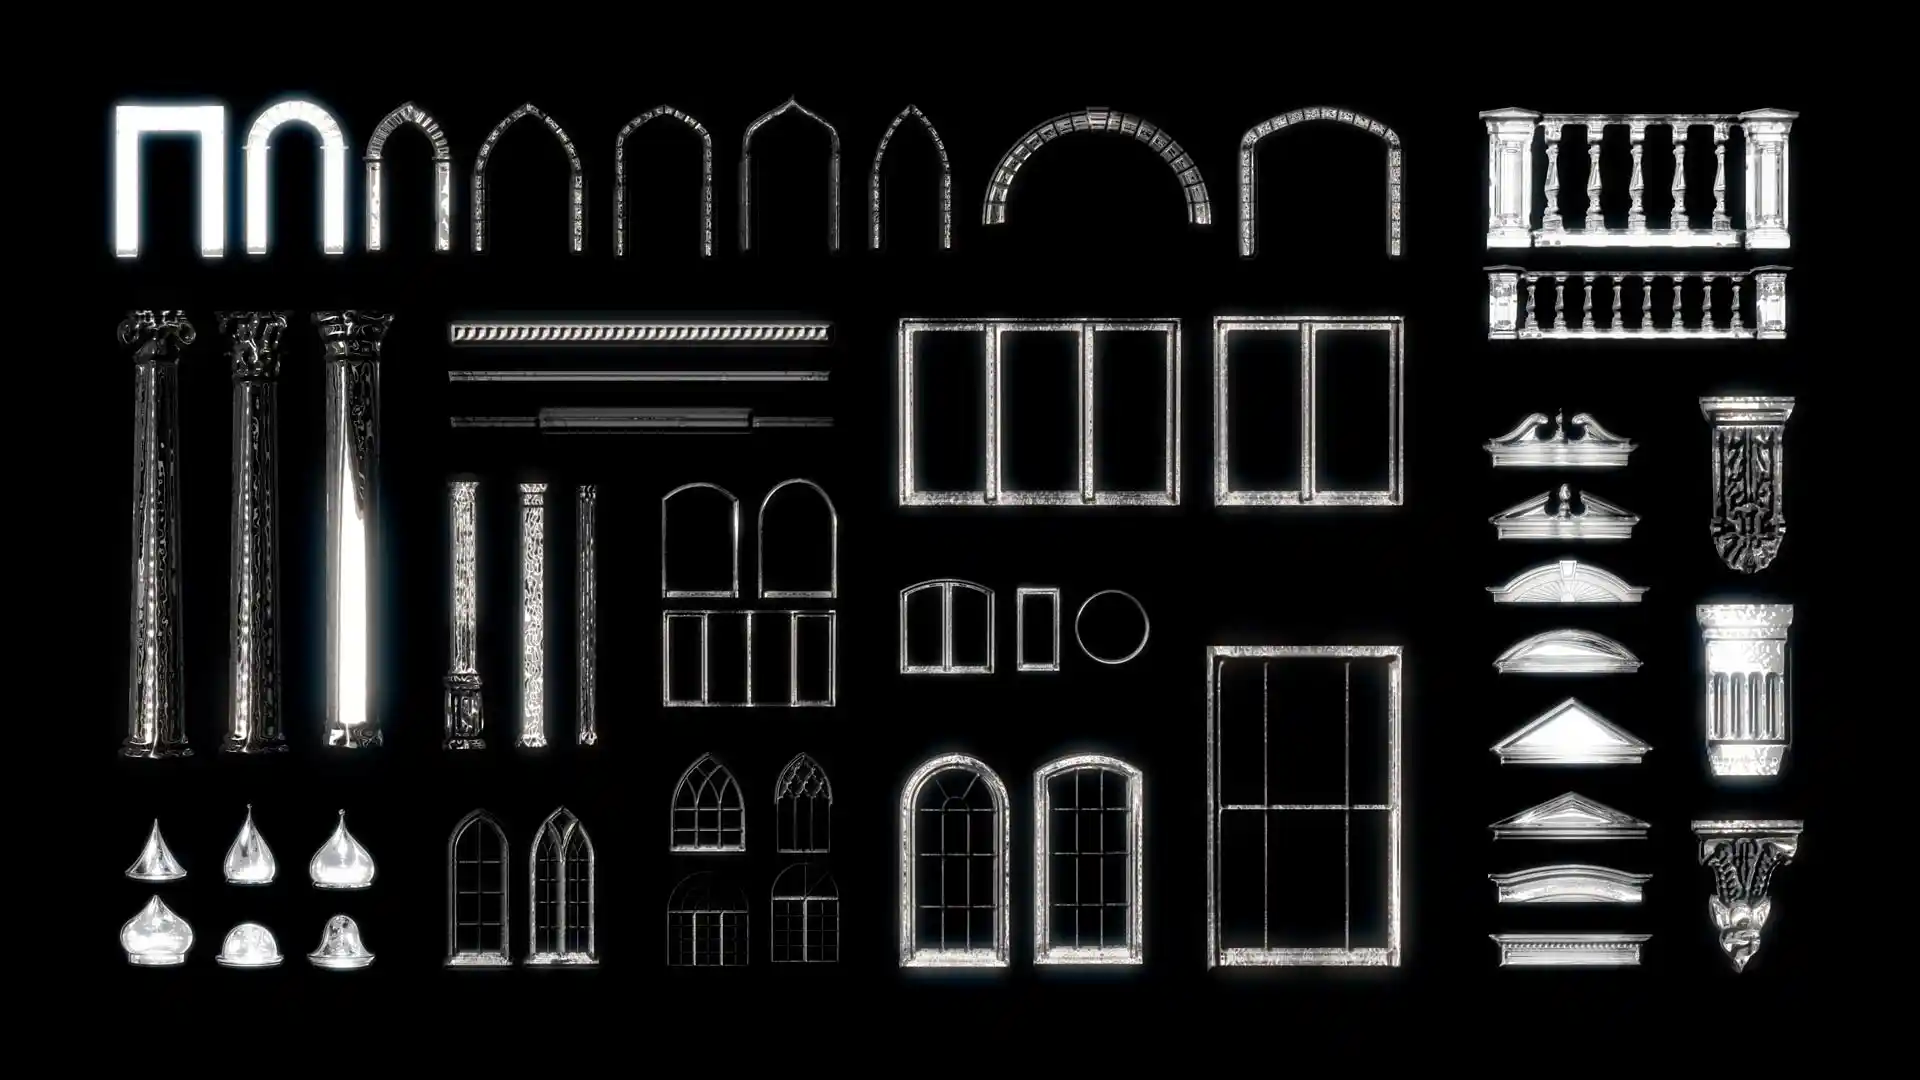
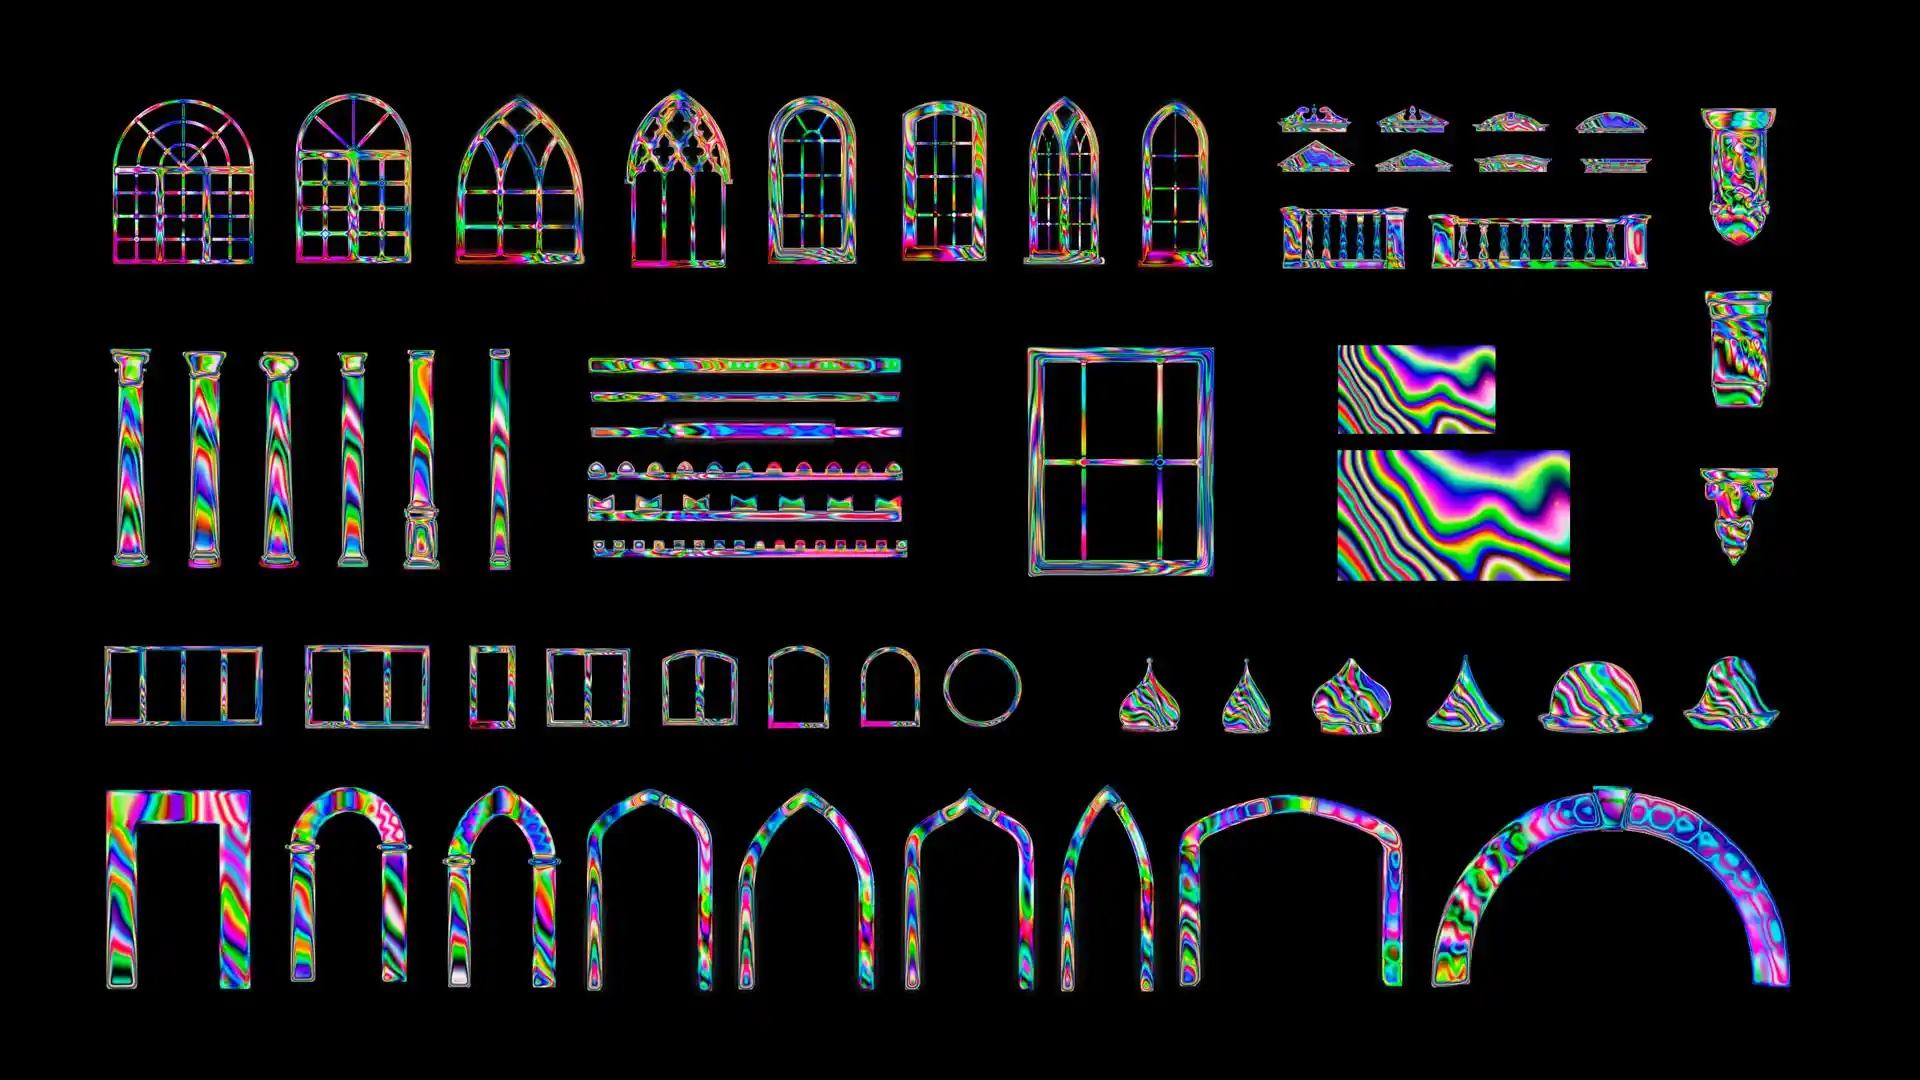
Architectural elements are ready-animated components with an alpha channel — arcs, pediments, columns, pilasters, balustrades, crenellations, cupolas, window frames, ornaments — animated in a consistent style: polygons, glitch, wireframe, lines and strokes, growing plants, fluid simulation, and so on. You place them over the real features of the building, scale and position them to match, and time them.
Our Video Mapping Toolkits are exactly this: PNG sequences and MOV files with alpha, up to 60 fps, sorted by element type and animation style. The reason they exist is that hand-animating a convincing extruded column takes a day and looks worse than one produced by someone who has animated four hundred of them.
How to place them properly:
- Drop the element on its own layer, above the wall texture.
- Scale it to the real feature, using the guide layer as reference. Match the width first, then the height — a column that is slightly too short reads as an error; a column slightly too narrow does not.
- Correct perspective with a corner pin if the facade has any convergence, even on an orthographic guide.
- Offset the timing. If eight windows all light in the same frame it looks like a switch. Stagger them by 2–6 frames and it looks like a wave.
- Vary the animation style between passes. Wireframe on the first appearance, solid on the second, destruction on the third.
Timing on the timeline is where the show lives. Move elements in and out on the beat. A mapping show has the same structure as a track: an intro that establishes the building, a build, a drop where the architecture breaks, a breakdown, and a resolution that puts the building back.
Video Mapping Toolkits
Animated architectural elements with alpha channel
-
Sale!
Video Mapping Toolkit Vol.1 – Green Nature
Original price was: 189€.129€Current price is: 129€. -
Sale!
Video Mapping Toolkit Vol.2 – Call Poseidon
Original price was: 189€.89€Current price is: 89€. -
Sale!
Video Mapping Toolkit Vol.3 – Facade
Original price was: 149€.99€Current price is: 99€. -
Sale!
Video Mapping Toolkit Vol.5 – Light Ray
Original price was: 149€.99€Current price is: 99€. -
Sale!
Video Mapping Toolkit Vol.10 – Stone Reflect
Original price was: 149€.99€Current price is: 99€. -
Sale!
Video Mapping Toolkit Vol.4 – Liquid Displace
Original price was: 149€.99€Current price is: 99€. -
Sale!
Video Mapping Toolkit Vol.8 – Visual LSD
Original price was: 149€.99€Current price is: 99€. -
Sale!
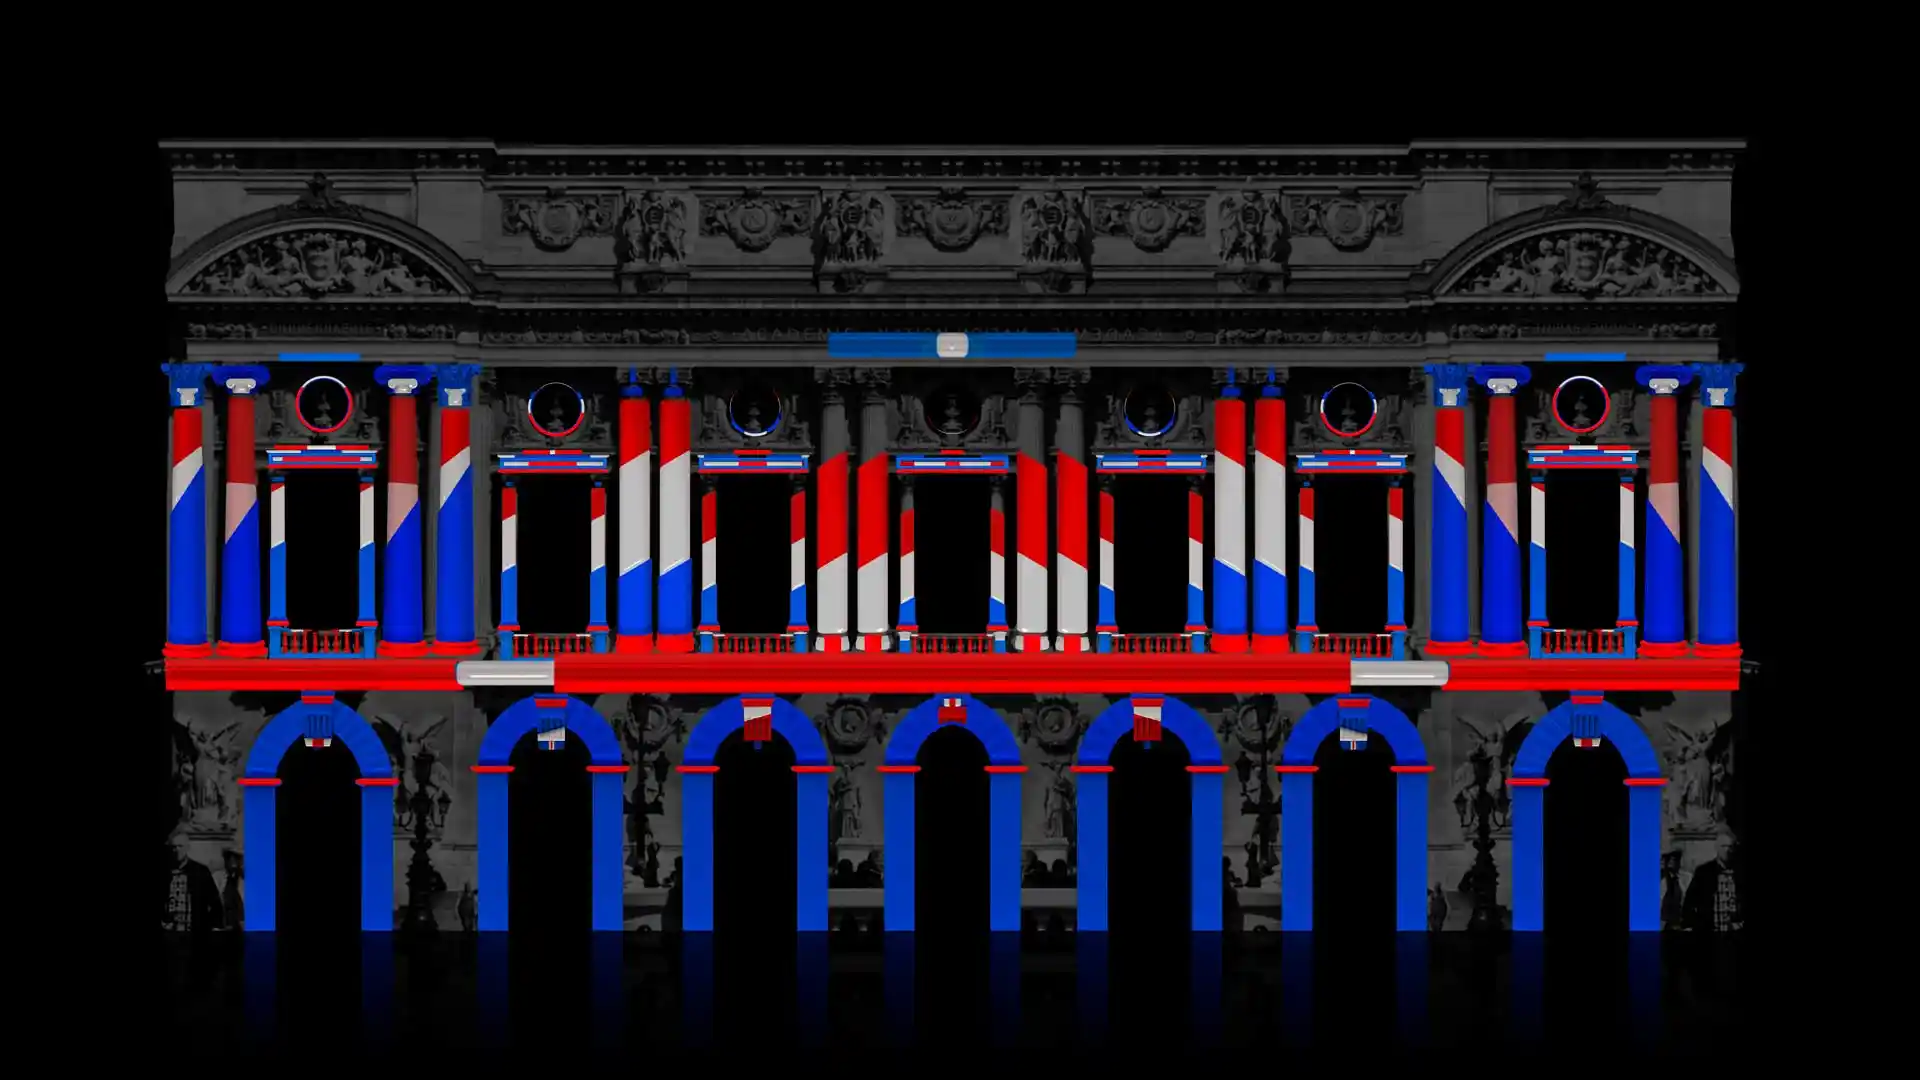
Video Mapping Toolkit Vol.7 – Colorful France
Original price was: 149€.79€Current price is: 79€. -
Sale!
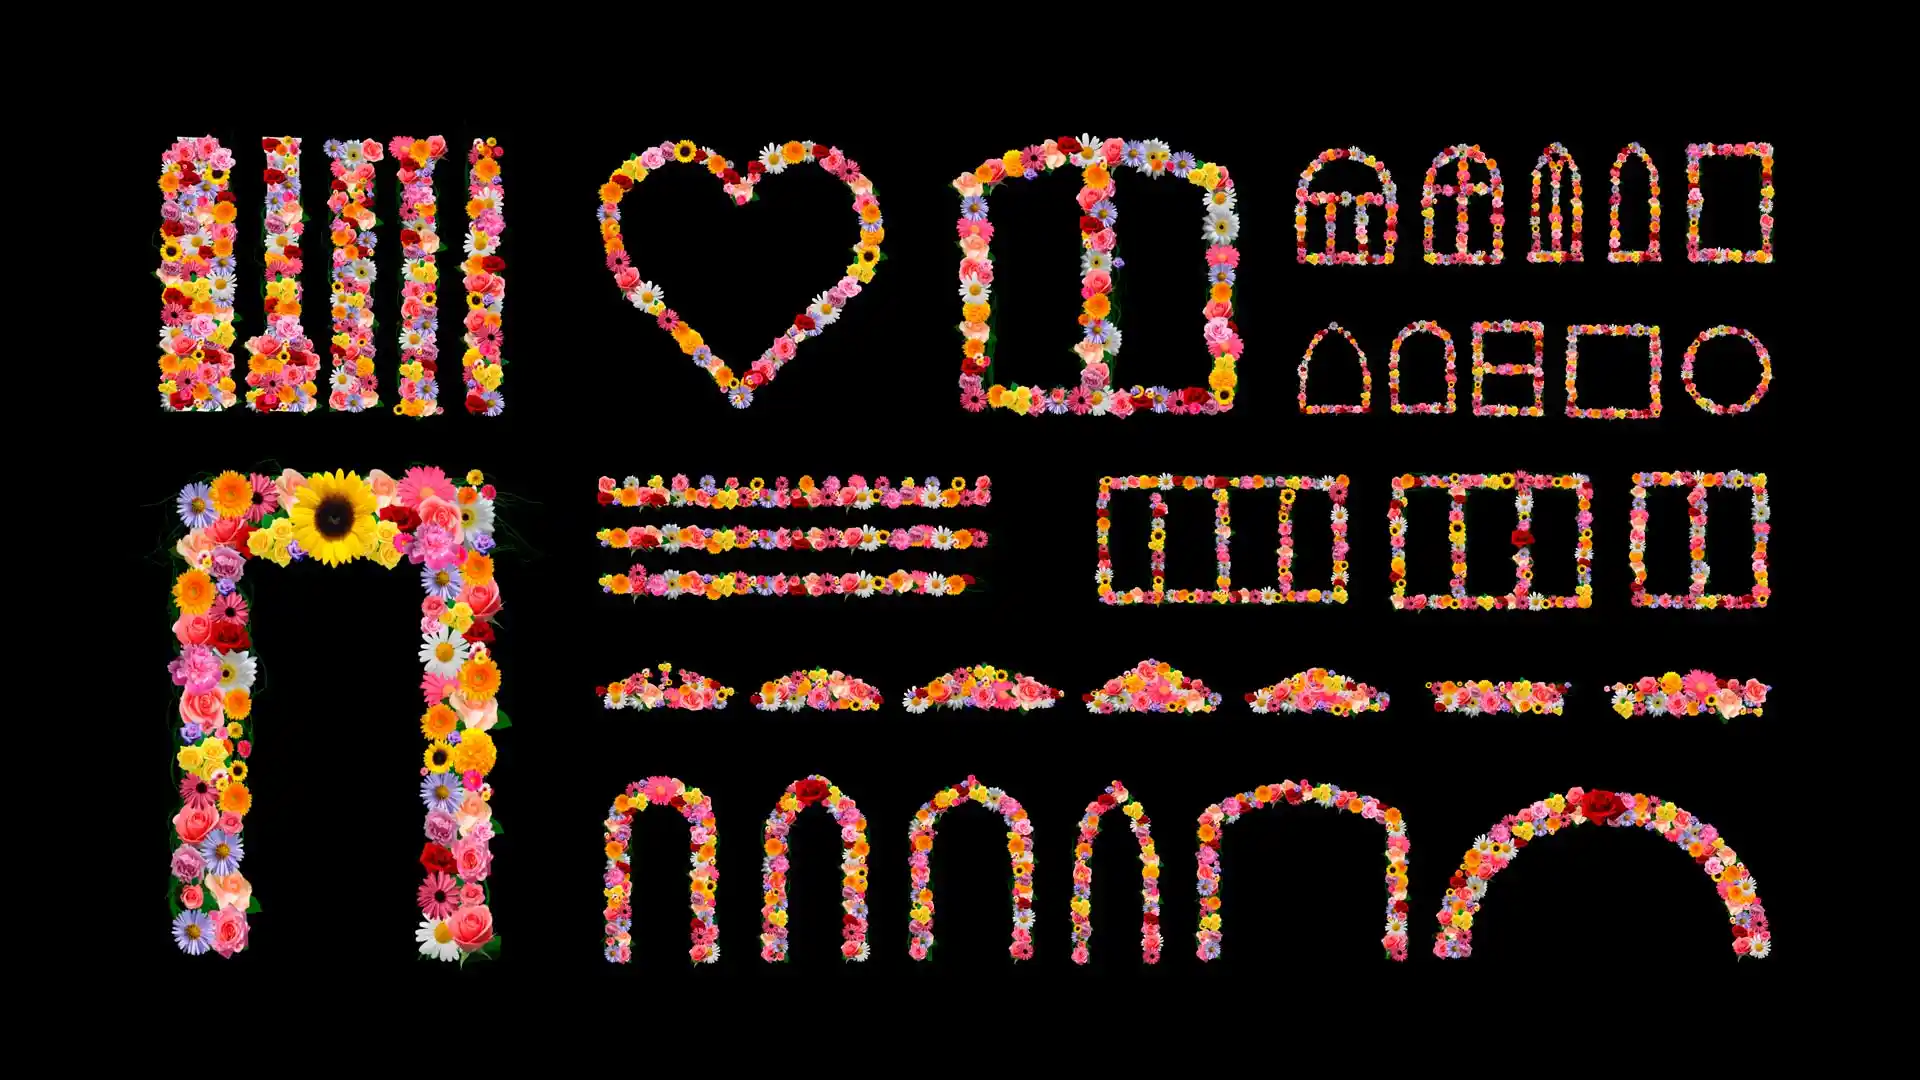
Video Mapping Toolkit Vol.14 – Flower Boom
Original price was: 149€.99€Current price is: 99€.









Step 5 — Build depth with mapping loops and textures
Architectural elements give you objects. Video mapping loops give you depth.
These are the monochrome or limited-palette 3D animations — folding surfaces, extruding cubes, displacement fields, falling walls, tunnels, fluid fabrics — designed so that when projected onto a flat facade the eye reads them as real depth. That illusion is entirely a function of light and shadow: a bright edge next to a dark one reads as an edge in space. This is why so much mapping content is close to black and white, and why colourising it aggressively usually destroys the effect.
Use them three ways:
As the base layer. A displacement loop under everything, at low opacity, gives the whole wall a subtle breathing depth even when nothing else is happening.
As the transition. Falling walls, fold surfaces and crack effects are how you get from one scene to the next without a cut. A hard cut on a building looks like a mistake; a wall collapsing into the next scene looks intentional.
As the drop. The moment the audience films is almost always a depth effect — the facade extruding, folding, or falling apart. Build the whole show toward one or two of these.
Our Video Mapping Loops category is the library we built for this, and the projection textures — ornaments, materials, architectural patterns with alpha — sit on top of them.
A practical note on scale. Loops are produced at a standard aspect ratio and your facade is not standard. Do not stretch them to fit. Tile them, or crop and reposition, or build the composition so the loop occupies the central mass and the edges are handled by elements. A stretched loop is immediately visible because the geometry stops being square.
Step 6 — Sound design, which is half the show
A silent mapping show is a light display. Sound is what makes an audience stand still for eight minutes, and it is the most commonly skipped stage in amateur productions.
Two different things go into the soundtrack:
The music bed. A composed track for the whole show, structured to match your visual arc. This defines the length of everything. Write or licence the music before you finish the animation, not after — retiming a finished eight-minute composite to a new track is a day of work.
Synced sound effects. Every architectural event needs a sound tied to the exact frame: a wall cracking, stone falling, ice forming, metal machinery, fire, plants growing. This synchronisation is what sells the illusion. When a column visibly extrudes and you hear stone grinding on the same frame, the audience believes the building moved. Two frames late and the effect collapses.
The Video Mapping Store Music & Sound Effects library is built for this specific job — cinematic event music albums composed as complete show soundtracks, and themed sound-effect packs matched to the standard mapping events: fire, ice, walls movement, fallen walls, wood destruction, robotics, growing plants, sand buildings. Everything in MP3 and WAV, royalty-free for commercial events. The effect packs pair one-to-one with the toolkit animation styles, which is the whole point of them — you are not hunting for a sound that might work with a wall collapse, you are using the one made for it.
Practical rules:
- Cut the audio to the visual, not the other way round, once the music bed is locked.
- Leave silence before the biggest moment. A half-second gap before the drop makes the drop twice as loud without touching a fader.
- Test at the venue’s actual volume. Sound that is subtle on headphones disappears completely on a square with two hundred people on it.
- Check the delay. At 100 metres, sound arrives about 0.3 seconds after the light. On very large sites this is worth compensating for.
- Deliver the audio as a separate WAV as well as embedded in the video master. Media servers frequently want them separate.
Step 7 — Export: the settings that decide whether it plays
This is where most first shows fail, and it is entirely fixable with the right preset.
Resolution. Export at the projector’s native output resolution or the total blended canvas resolution. Not higher. A 4K master played through a 1080p projector costs you playback performance and gains you nothing.
Codec — this is the important part. A normal MP4 with H.264 is designed to play once, forwards, at one speed. The moment a media server scrubs, reverses, changes speed, or stacks several clips, H.264 has to decode long groups of frames and it chokes. On a laptop it will stutter or drop frames.
| Codec | Use it for | Notes |
|---|---|---|
| HAP / HAP Q / HAP Alpha | Real-time playback in most VJ and mapping software | GPU-decoded, large files, scrubs perfectly. HAP Alpha for layers with transparency. |
| DXV3 | Resolume Arena and Avenue | Resolume’s own codec, fastest option inside Resolume. |
| ProRes 422 / 4444 | Masters, archives, delivery to a client or festival | 4444 carries alpha. Big files, excellent quality. |
| NotchLC | High-end media servers | If the venue uses it, they will tell you. |
| H.264 / H.265 | Preview, client approval, social | Never for live playback. |
Convert with the free tool Shutter Encoder, or export HAP directly from After Effects if you have the plugin installed. Keep a ProRes master for archive and generate the playback codec from it.
Alpha channels. Any layer you intend to composite live in the mapping software — elements, overlays, logos — must be exported with alpha, which means MOV with ProRes 4444 or HAP Alpha. Our Alpha Channel Videos are supplied this way for exactly this reason.
Storage. HAP and ProRes files are large. Run the show from an internal SSD or an external SSD over USB-C or Thunderbolt. A show that stutters on a spinning USB drive will play perfectly from an SSD, and technicians lose hours diagnosing this as a software problem.
Loop point. If any part of the show loops, check the loop by playing the last two seconds into the first two, repeatedly, at full speed. A one-frame mismatch is invisible in the timeline and extremely visible on a building.
Logos and white. Projectors throw white far more brightly than any colour, and black as nothing. Always keep a white version of a client logo. A dark blue corporate logo that looks correct on screen will be nearly invisible on a facade at night.
How to make AI video mapping content
AI-generated content became genuinely usable for mapping around 2025, and in 2026 it is a normal part of the pipeline — not as a replacement for the workflow above, but as a way to produce texture and atmosphere passes in hours instead of weeks.
The whole approach depends on one thing: the building mask is the control image. Everything the AI generates is constrained by it. Without that constraint you get beautiful images that do not fit the architecture, which is worthless.
The four-step AI pipeline
Step 1 — Start from the building mask. For a festival, the organisers supply it. For a client project, it is the same orthographic guide you built earlier. Ideally you have it with an alpha channel or as a luma mask, because you will need that later to cut the generated frames cleanly. Note the aspect ratio — most facade masks are 16:9 — because you must match it at generation time or the AI will crop your building.
Step 2 — Write the prompt, then generate the image. Use a language model to write the prompt rather than writing it yourself; describing a visual style precisely is a specific skill and the models are good at it. Ask for the style, the material, the era, the lighting direction.
Then generate with a model that respects a reference image. Nano Banana Pro — Google’s Gemini 3 Pro Image, model ID gemini-3-pro-image — is currently the strongest option for this because it grounds tightly to a supplied reference and renders text and fine detail without dissolving the source geometry. Supply the building mask as a reference at high strength, set the aspect ratio to match the mask, request high quality and high resolution, and generate four variants rather than one.
Pricing as of July 2026: through the API, roughly $0.134 per 1K–2K image and $0.24 per 4K image, with batch and flex tiers around half that. It is not available on the free API tier. For consumer access it comes through Gemini Advanced in Google One AI Premium at about $19.99 per month. Higgsfield also bundles it alongside its video models, which is convenient if you are going to animate in the same place.
Step 3 — Verify the fit before you animate. This step is not optional and it is the one people skip.
Bring the generated image into After Effects on top of a composition containing your mask. Fit it to the comp (Ctrl/Cmd + Shift + Alt/Option + H), drop the opacity to about 40%, and look at whether the architectural features line up. Then check it again against a luma mask, which shows the errors far more clearly than eyeballing the overlay. Some models will look impressive and be structurally wrong — the windows drifted, the cornice bent, the tower is a different width. Discard those. Generating four more variants costs a few cents; animating a wrong one costs a day.
Step 4 — Animate with first-frame / last-frame. This is the technique that makes AI usable for mapping. Rather than prompting a video from nothing, you supply two of your verified still images — one as the first frame, one as the last — and let the model interpolate between them. Because both ends are already registered to the building, the animation stays registered too.
Use a platform or model that supports last-frame conditioning. Higgsfield aggregates most of the current video models under one subscription — Kling, Veo, Sora, Seedance and others — at roughly $15, $39 and $99 per month billed annually for about 200, 1,000 and 3,000 credits respectively. Credit cost varies sharply by model: a Kling generation runs around 6 credits, while the heavier models run 40–70. For mapping work the cheaper fast models are usually correct, because you are animating texture, not telling a story with a camera move.
Keep prompts minimal at this stage. The two images already carry the visual information; a short instruction like “slow growth, gentle light movement” is enough. Long prompts fight the reference frames.
Chain the clips. To build a longer sequence, take the last frame of your first generation and make it the first frame of the next. Stitch the pair in After Effects, cut the excess with your luma mask, and hide the join by overlapping the second clip on the first and cross-fading opacity over 6–12 frames. Done properly the seam is invisible.
Step 5 — Upscale and encode. Generated video comes out soft and low-resolution relative to a facade. Upscale in Topaz Video AI at 4×, add a small amount of grain to break up the plastic look, and export ProRes. Then convert to HAP or DXV for playback like any other clip.
Then send it to the organisers. Any festival will check your file against the building before the show. Give them time to come back with corrections.
What AI still cannot do for a mapping show
Be honest with yourself about the limits, because they are consistent:
- It cannot hold precise registration over a long show. Every generation drifts a little. Over eight minutes of chained clips the building slowly stops being the building.
- It does not produce alpha channels. Everything arrives as a flat frame. Anything you need to composite over architecture still has to be cut with a luma mask by hand.
- It cannot loop. A seamless loop requires the last frame to equal the first, and video models do not guarantee that. You have to construct the loop yourself.
- It cannot respect real 3D geometry. It is matching a flat image, not a model. The moment the facade has genuine depth — projecting bays, a portal, a tower — AI output will look painted on, because it is.
- It cannot match a brand asset. A client’s exact logo, colour and typeface still has to be built by hand.
The practical conclusion: use AI for texture, atmosphere and background passes, and use toolkits and hand-built elements for anything that has to sit precisely on architecture. The two layers together produce a better show than either alone, and that combination is what most 2026 festival entries actually are, whether or not the artists say so.
Our AI Visuals category is produced this way — generated, corrected, cut, and encoded for playback rather than exported straight from a browser.
How to project it: from file to facade
The content is finished. Now the ten minutes on site.
What projector and what machine you actually need
Two pieces of hardware decide whether the show happens: the projector that throws it, and the computer that plays it.
Throw ratio comes before brightness. Throw ratio is distance divided by image width. A projector with a ratio of 2 needs to stand 30 metres back to cover a 15-metre facade — often impossible in a real square or garden. A short throw lens, anything between roughly 0.4 and 1, covers the same width from a fraction of the distance. Anything in that range is worth paying for, because standing further back also costs you brightness and increases the number of trees, cars and people that end up in the beam.
Ultra short throw units are the exception: they sit almost against the surface, but they have shallow depth of focus and visible lens distortion, and they are a poor choice for mapping anything with depth.
The simplest test costs nothing: take the projector to the site, project a plain white field, and walk backwards until the whole surface is covered. Now you know your real throw distance. ProjectorCentral’s throw calculator will do the same on paper — treat its brightness warnings as conservative, since they are calibrated for lit conference rooms rather than a dark square at midnight.
Brightness by situation, not by ambition.
| Situation | Practical minimum |
|---|---|
| Small object, indoor, fully dark | 2,000–3,000 lumens |
| House or small facade, dark, light surface | 3,000–3,500 lumens |
| House with dark brick or street lighting nearby | 4,000–6,000 lumens |
| Mid-size facade, semi-controlled light | 10,000–20,000 lumens |
| Large facade or landmark, high ambient | 25,000 lumens and up, usually multiple units |
Look for ANSI lumens, which is a standardised measurement, and be sceptical of unbranded units advertising very high figures at very low prices. If the number looks impossible for the money, it is.
Resolution. Full HD is the practical minimum; below that, an average facade shows visible pixels. Watch the marketing carefully: a projector advertised as having a “4K input” can accept a 4K signal but its native output is frequently still 1920×1080. And there is no point owning a 4K projector if your content is 1080p — the extra resolution only helps if the whole chain, including your source material and your machine, can carry it.
Lamp or laser. Lamps are cheaper up front and now last around 5,000 hours, but they lose brightness noticeably over their life — which matters when you have four projectors blended and one is dimmer than its neighbours. Laser runs past 20,000 hours at stable output, with less heat and better colour, at a higher purchase price. For a single seasonal show, a lamp unit is fine. For anything permanent or repeated, laser wins.
The production machine. After Effects is the constraint, not the mapping software. Treat Adobe’s recommended specification as your minimum rather than your target: a multi-core processor, 32 GB of RAM rather than 16, a GPU with at least 4 GB of VRAM and preferably more, and fast local storage. Mapping software is comparatively light, but multi-layer HAP playback is bound by disk throughput and VRAM, not by CPU — which is why a modest laptop with an SSD often outperforms a powerful one with a spinning drive.
Keep the show on internal or Thunderbolt-connected SSD storage, and keep a second copy on a separate drive. Drives fail on the day of the show more often than statistics suggest.
Object, stage, cake and car mapping: what changes
The pipeline above is written for a facade because a facade is the hardest case. Smaller surfaces use the same workflow with three differences worth knowing.
Objects and boxes. Geometry is simple and each face gets its own surface, so mapping is fast — but the faces are small and often at sharp angles to the projector, which means content must be prepared per face in the correct shape. A square clip on a triangular face will look stretched no matter how well you map it. Brightness requirements drop dramatically because the surface is small and usually indoors.
Stage and set mapping. The surface moves, or people move in front of it. Design content that survives a performer walking through the beam — high contrast, low detail in the lower third, nothing where a face will be lit from the front. Stage mapping usually runs live rather than as a timeline, which is where Resolume’s layers and MIDI control earn their price.
Cake and small-object mapping for events. Very short throw, very small surface, very bright relative to size — which means low lumens are enough and a compact projector on a stand works. The whole show is typically 60–90 seconds and loops. Because the object is a cylinder or a tiered cylinder, spherize and mesh warp do most of the work. Content is almost always licensed rather than animated, because the budget for a wedding does not support bespoke 3D.
Car mapping. The hardest small surface: metallic, curved, reflective, and every panel bounces light differently. Matte the car with temporary spray or film if you are allowed to, use multiple projectors from opposite sides, and keep content abstract — reflective paint destroys detail. This is the one case where photogrammetry of the actual vehicle is worth the time.
Interior and immersive rooms. Several projectors, heavy edge blending, and content built at the total canvas resolution rather than per projector. The mapping is easier because the surfaces are flat; the blending is harder because the audience stands inside the image and will see any seam.
Connect the projector properly
Plug in over HDMI and set your display to extended, not mirrored. This is the single most common beginner mistake and it produces exactly the symptom people describe as “the software isn’t working”: mirroring sends your desktop to the projector, extending gives you a separate output you can send visuals to. Set the extended display to your show resolution and confirm you see two separate displays, not stacked or duplicated ones.
Then, in your mapping software, select the projector as the video output — not your laptop screen — and go full screen. Learn the shortcut to leave full screen before you enter it (Cmd-T in MadMapper). If the display configuration is wrong, everything goes black and you need a way out.

Map the surfaces in MadMapper
MadMapper is the most approachable professional mapping tool and it has a free watermarked demo, so it is where to learn. The workflow:
Send a test pattern first. From the media tab, drag a generator — a grid is ideal — onto the output. You immediately see the projector’s coverage. The grey bounding box in the interface represents the edges of the projected image; anything outside it will not appear on the wall. Drag your content to the full area once to understand your real coverage.
Create one surface per face. Grab the corners of the surface and drag them until they line up with the corners of the real object. Nudge with the arrow keys for small corrections, and let the snapping pull corners into place when you get close. Add a separate surface for each plane of the object.
Use masks for anything not rectangular. If you drag a square onto a triangular face and pull the corners in, your content skews badly. Instead: place a roughly correct square, then add a mask in the shape you need, and invert it so only the shape you want is revealed. Stack masks to carve out windows and doorways, and put different footage behind each masked region — a strobe in the doorway, colour in the windows.
Mesh warp and spherize for curves. A flat quad on a cylinder or a dome shows a hard edge that does not follow the form. Turn on mesh warping to add control points you can push and pull, or use spherize to bend the content around a rounded surface in one step. This is how columns, drums, cylinders and domes get mapped convincingly.
Generate outlines. Select your surfaces, right-click and create lines, and you get a new slice containing clean outlines of every mapped shape. Group them separately from the filled surfaces. Outlines are the cheapest, highest-impact effect in mapping — a building drawn in moving light lines reads instantly, costs almost nothing to produce, and is what you fall back on when a scene is not working.
Watch the global media trap. Editing a material’s properties in the media library changes it everywhere that material is used. If you want one surface to differ, right-click and duplicate the media first, then edit the copy. People lose an hour to this.
Use the input side of the interface. The left panel is the source. Reposition, scale and rotate your content there to fit each surface precisely, rather than distorting the surface itself. And prepare content that matches the shape of the face — a triangular clip for a triangular face — so nothing looks stretched.
Camera-assisted mapping. MadMapper’s Space Scanner (formerly Spatial Scanner) projects structured patterns, captures them with a camera, and reconstructs what the projector sees. You get a photograph of the scene from the projector’s exact point of view, which you can then map onto with the projector switched off — useful on an expensive rented unit, and enormously useful on a fixed installation where you can take the scan home and build the show at your desk. It is optional; it is also the single biggest time saver in the software. Note that full resolution requires a supported Canon camera through Canon’s SDK; other cameras work as webcams at reduced resolution.
Build scenes and cues
Do not run a mapping show by dragging clips live unless you are improvising to music on purpose.
Set up each look — surfaces, materials, effects, colours — and store it as a scene or cue. Select all the slices and groups before you store, or the scene will only capture part of the state. Set a transition time between cues; 0.2 seconds is a good default, fast enough to feel deliberate, slow enough not to flash. Then bind a single keyboard shortcut, usually the spacebar, to “next cue”.
Now you can run the entire show with one key while listening to the music. This is also what makes a show reproducible: the same cues, the same order, every night.
Resolume Arena for live and for blending
Resolume Arena is the other half of the standard toolkit and the industry default for live visual performance. Where MadMapper is built around mapping, Arena is built around performing — layers, decks, columns, effects, MIDI and audio-reactivity — with mapping handled in its Advanced Output panel.
Advanced Output is where you slice the composition, warp each slice to the geometry, and edge-blend overlapping projectors. Edge blending is what makes four projectors look like one image instead of four; you overlap the beams by 10–20%, apply a matched gradient to each overlapping edge, and the seam disappears. This is not optional on any facade wide enough to need more than one projector.
A very common professional setup is both at once: content played and performed in Resolume, sent to MadMapper over Syphon or Spout for the mapping. If you already own one, learn it properly before buying the other.
On site, in order
- Position and lock the projector. Level it, focus it, and lock everything mechanically. Once mapping starts, the projector must not move by a millimetre.
- Project a test card. A 1920×1080 grid with corner markers, colour bars and labels tells you instantly whether the whole surface is covered, whether the image is oriented correctly, and whether focus and colour are right — before you commit to mapping.
- Use lens shift and physical positioning, not keystone. Digital keystone correction resamples the image and softens it. Move the projector or use the lens.
- Map, from the largest surfaces down to the details.
- Run the whole show once, at full brightness, in the dark. Watch it from where the audience will stand, not from behind the laptop.
- Check the sound at real volume.
- Photograph the projector position and mark the floor so it can be restored exactly if it has to be moved.
Unattended and long-run playback
If the show runs for weeks rather than one night, do not leave a laptop outdoors. Use a media player: a small device that plays files from an SD card or USB stick over HDMI. Two features matter — that it supports your resolution, and that it loops seamlessly. Many cheap players stutter or flash black at the loop point, which ruins a show that repeats every four minutes.
For anything more sophisticated — scheduled start and end times, playlists, several outputs — a Raspberry Pi running Falcon Player (FPP) is the standard low-cost solution, free and well documented.
And if the projector lives outdoors, it needs an enclosure that is weatherproof, ventilated enough that the unit does not overheat and shut down, stable enough that the map does not shift, and secure enough to deter theft. Use anti-reflective projector port glass rather than plexiglass for the beam opening — plexiglass measurably reduces and distorts light output.
The mistakes that ruin a first show
Every one of these is common, and every one is avoidable in advance.
Mirrored display instead of extended. Ten seconds to fix, and it has cost more first-timers their evening than any other single thing.
H.264 playback. The show stutters, the technician blames the laptop, and the actual problem is the codec. Convert to HAP or DXV.
Designing before deciding the method. Content built with the projector’s perspective baked in cannot be moved. Decide outline versus orthographic first.
Projecting onto dark or textured surfaces without testing. Take the projector to the site and look, in the dark, before you animate anything.
Ignoring ambient light until show night. It is the single largest factor in perceived quality and the only one you can fix for free.
Skipping the sound. A silent show empties a square in ninety seconds.
Stretching content to fit. Tile, crop or recompose. Never scale non-uniformly.
One flat layer. If the architecture is not separated into components, the show will look like a screen bolted to a building.
No test card, no rehearsal, no marked projector position. All three are five-minute insurance policies against a lost evening.
The fastest honest route from zero to a finished show
If you want to produce a real show in days rather than months, this is the order that works, and it is the method the whole library was built to support:
One: build the orthographic guide of the facade. Half a day, once.
Two: licence the components instead of animating them — Video Mapping Loops for depth, Video Mapping Toolkits for architectural elements, Video Mapping Audio for the score and the synced effects.
Three: composite them onto the guide in After Effects, with your own timing and your own structure. This is where your show becomes yours — the same components, arranged differently, produce completely different shows.
Four: export HAP or DXV, map in MadMapper or Resolume, store your cues, run it.
This is not a shortcut in the sense of a compromise. It is how a large part of the professional market works, because animating a photoreal extruded column from scratch takes a day and produces something worse than a component made by someone who has animated hundreds of them. Spend your time on composition, timing and sound — the things that are actually yours.
Learn the whole method: Happy Mapping
Everything above is the written version of a workflow that is much easier to watch than to read. That is why I recorded it.
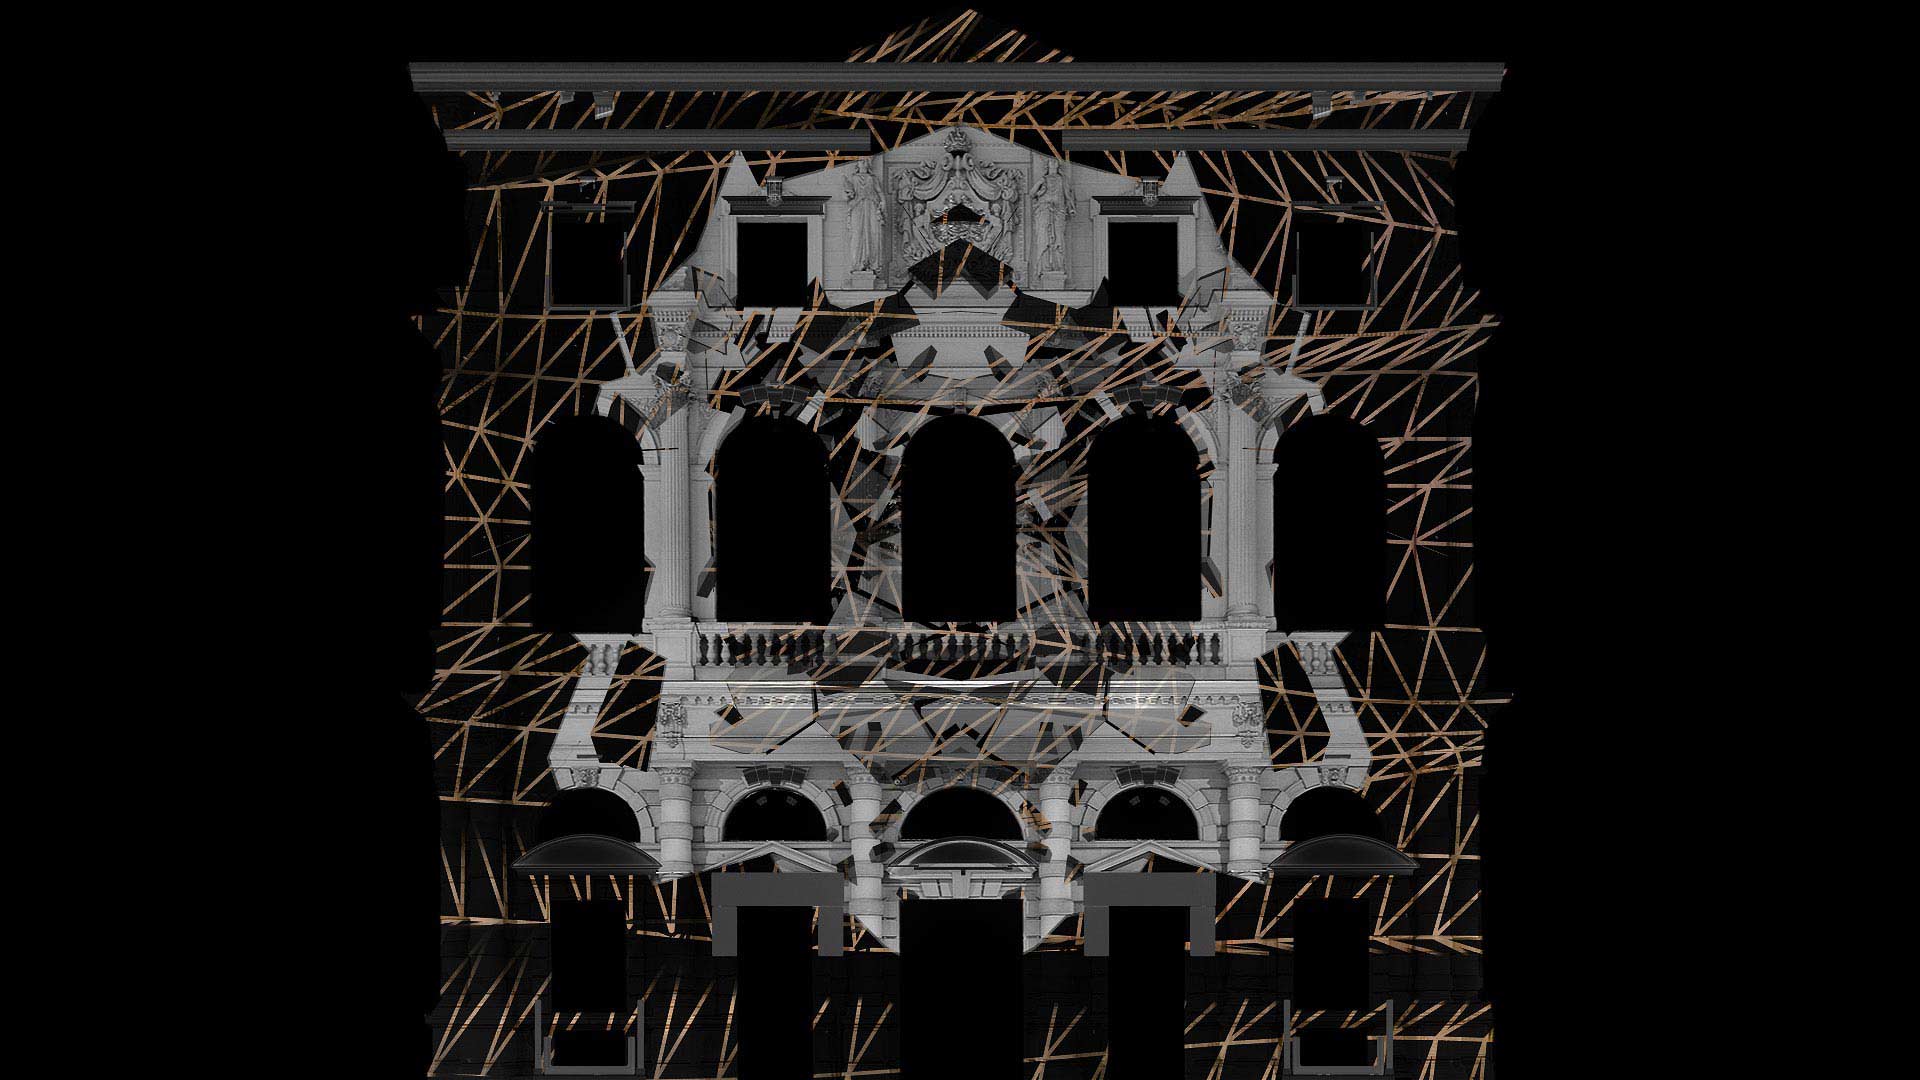
Happy Mapping is my projection mapping course for beginners: 9 videos, about 3 hours, €249, in English and Russian. It covers exactly this pipeline — compositing in Adobe After Effects and running the show in Resolume Arena — using ready-made components and correct compositing technique rather than animating everything from zero.
It includes the working materials: 2 Video Mapping Loops packs and 2 Video Mapping Toolkits, which on their own are worth more than the course, and the licence lets you use them in an unlimited number of real shows. So the course is also a content library you keep.
It is aimed at three groups: people entering media art who want a first working method; event and rental agencies who need to produce video shows quickly in-house; and motion designers and mapping companies who want a faster production technique than the one they are using.
If you are working through this guide and want to see each step performed rather than described, Happy Mapping is the fastest way to get there.
Video Courses
Learn the method from the artist who built it
-

 Select options This product has multiple variants. The options may be chosen on the product page
Happy Mapping – Projection Mapping Course
249€

Frequently asked questions about making video mapping
What software do I need to make video mapping?
Two kinds. For creating the content: Adobe After Effects, or DaVinci Resolve and Fusion if you want a free option. For mapping the content onto the object: MadMapper or Resolume Arena. They are separate stages and separate tools — most professionals use one from each group.
Can I make video mapping only in After Effects?
You can produce the content in After Effects, and with the orthographic method you can even do simple mapping there using corner pins. But for anything with masks, curved surfaces, multiple projectors or live control, dedicated mapping software is far faster and more reliable.
What resolution and codec should I export?
Export at the projector’s native output resolution, not higher. Use HAP or HAP Alpha for general real-time playback, DXV3 if you are running Resolume, and ProRes 4444 for masters and anything with an alpha channel. Never use H.264 for live playback — it stutters as soon as the media server scrubs or changes speed.
Why does my mapping content look flat on the building?
Usually one of three reasons: the architecture was not separated into layers, so everything sits on one plane; the content has no strong contrast, and projected black is projected nothing; or there are no depth loops underneath. The 3D illusion in mapping is entirely built from light and shadow.
How do I map a curved or rounded surface?
Use mesh warping to add control points you can push and pull to the form, or the spherize function for a simple curve. Both are standard in MadMapper. For a dome or a cylinder, also prepare the source content in the correct projection rather than stretching a flat clip.
Do I need a 3D model of the building?
Not for a flat facade — a straight-on reference photo or an architectural elevation is enough. You need a model when the building has real depth you intend to use, when you are producing extrusion and displacement effects that must respect the geometry, or when the client wants a pre-visualisation. Free photogrammetry tools like Meshroom, 3DF Zephyr and Regard3D will build one from photographs.
Can I use AI to generate projection mapping content?
Yes, for texture and atmosphere passes, and it is now a normal part of the pipeline. Generate from the building mask as a reference image, verify the fit in After Effects before animating, animate using first-frame and last-frame conditioning so registration holds, then upscale and encode to a playback codec. AI will not give you alpha channels, guaranteed loops or precise architectural registration over a long show, so it works best combined with hand-built elements.
How long does it take to make a mapping show?
With licensed components and a good guide, a three to five minute show is realistic in three to five working days. Animating everything from scratch, the same show is four to eight weeks. Building the orthographic guide takes a few hours the first time and under an hour once you have done it a few times.
Do I need to licence the music?
Yes. Public performance of copyrighted music requires performance rights, and charging admission increases your exposure considerably. Showing it for free does not make it legal. Use royalty-free or commissioned music — it is cheaper than the alternative and it also means the show can go on YouTube without being flagged.
Can I reuse the same content on a different building?
Components — loops, toolkits, textures, audio — yes, under a royalty-free licence, on as many buildings as you like. The finished composite, no: it is registered to one facade. This is precisely why building a component library is worth more than building one show.
Sources
Software behaviour, codec support and pricing were checked against the vendors’ own documentation in July 2026. Technique is drawn from our own production work.
Software and technical references
- Adobe After Effects — helpx.adobe.com
- MadMapper — madmapper.com
- Resolume Arena — resolume.com
- Blender — blender.org
- Shutter Encoder — shutterencoder.com
- Topaz Video AI — topazlabs.com
- Falcon Player — falconplayer.com
- ProjectorCentral throw calculator — projectorcentral.com
Photogrammetry tools
- Meshroom / AliceVision — alicevision.org
- 3DF Zephyr — 3dflow.net
- Regard3D — regard3d.org
AI models and platforms
- Nano Banana Pro / Gemini 3 Pro Image — ai.google.dev
- Higgsfield — higgsfield.ai
Our own content libraries
- LIME ART GROUP — Video Mapping Loops, Video Mapping Toolkits, Alpha Channel Videos, AI Visuals
- Video Mapping Store — Music & Sound Effects, projection textures, animated facades
Compositing technique, timing practice and the on-site checklist are drawn from our own production experience rather than published documentation.
Start with one wall
You do not need a building. Map a box on your desk tonight with a cheap projector and the free MadMapper demo, and get the illusion to read on three faces. Everything in this guide is the same workflow at a larger scale — only the surface area, the brightness and the budget change.
When you are ready to produce something real, the components are here: Video Mapping Loops for depth, Video Mapping Toolkits for architecture, Video Mapping Audio for the score, and Happy Mapping if you would rather watch the method than read it.
And when you make something, post it in one of our VJ communities. Somebody there has already solved whatever is not working.
Latest Feature VJ Loops
Hand-picked visuals by our New Media Artists
-
Deep Serenas – Immersive Visuals Vol.2
149€ -
Sale!
VJ Loops Pack Vol.73 – Mirror Ballet
Original price was: 129€.99€Current price is: 99€. -
VJ Loops Pack Vol.18 – Abstract Background Textures
89€ -
VJ Loops Pack Vol.19 – Lovely Red
79€ -
VJ Loops Pack Vol.11 – Really Madonna
89€ -
Sale!
Interior Patterns – Immersive Visuals Vol.1
Original price was: 249€.199€Current price is: 199€. -
VJ Loops Pack Vol.85 – Gnosis Lightning
99€ -
VJ Visuals Starter Pack
99€ -
Sale!
 Select options This product has multiple variants. The options may be chosen on the product page
Immersive Projection Business Guide
Original price was: 19€.12€Current price is: 12€.









Best wishes from Vienna,
Thanks for your attention, faithfully yours,
Alexander Kuiava – Founder & CEO LIME ART GROUP
https://alexanderkuiava.com/
